Welcome to Moda Fabrics!
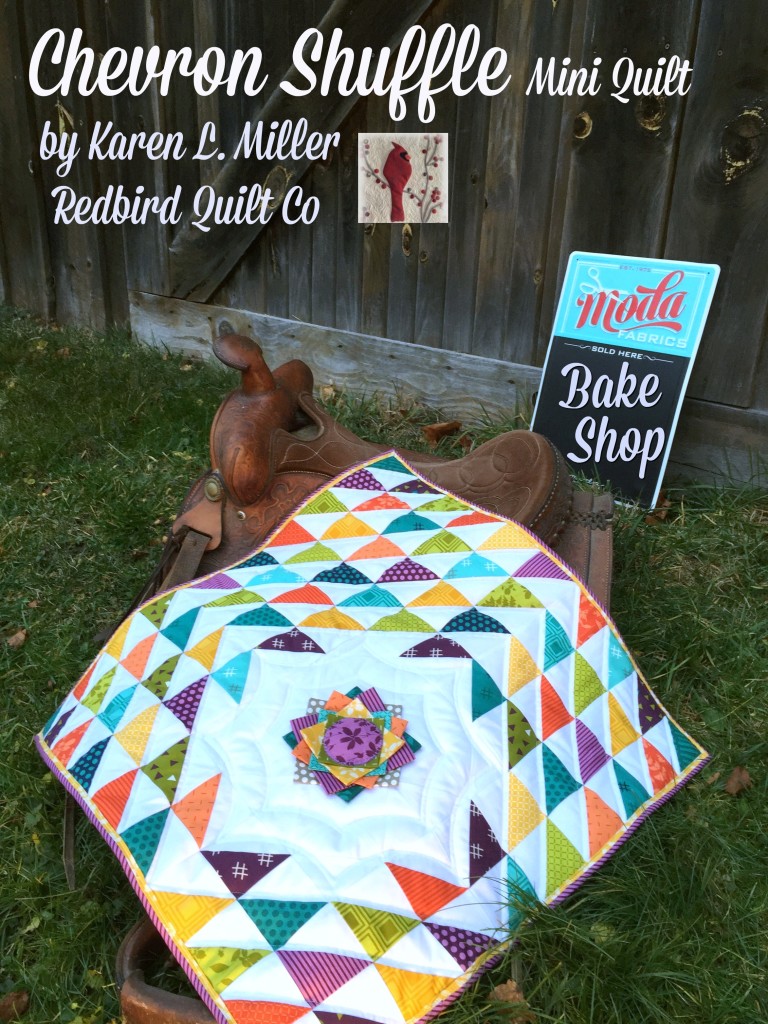
Chevron Shuffle Mini Quilt
Chevron Shuffle Mini Quilt
Greetings Moda Bake Shop readers and welcome to my rendition of the Moda Bake Shop Mini's in December. It's Karen from Redbird Quilt Co. and Karen's Quilts, Crows and Cardinals blog. When Lisa mentioned the Bake Shop was celebrating December by recreating original recipes in a Mini format I jumped for Joy! I hope YOU enjoy this variation of my February 2015 Chevron with a Twist quilt.
If you recall, Chevron with a Twist was created using 84 Half Square Triangles (HST's) prepared from a Layer Cake. Well, for the Mini version I decided to toss-out the Layer Cake and use a Charm Pack in its place.
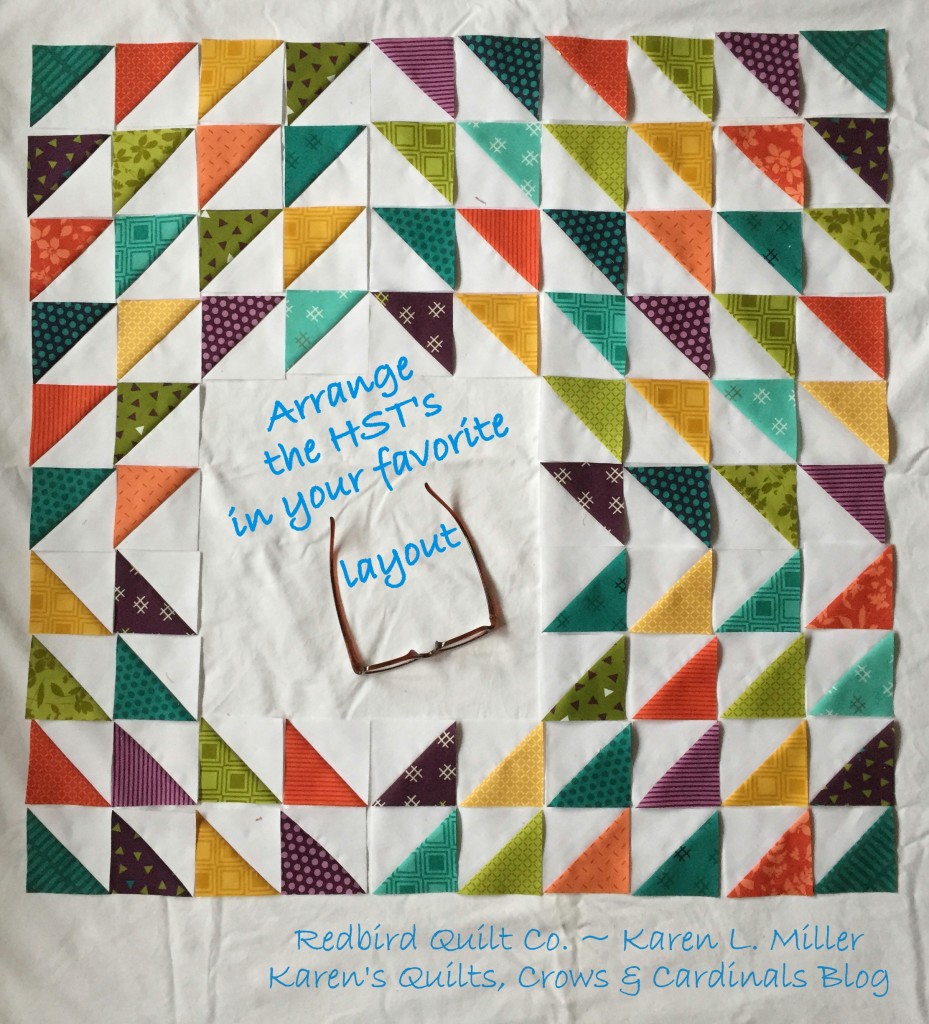
Oh, and instead of using a "Chevron" layout I decided to "Shuffle" the half square triangles into a "Focus" layout. If you're not familiar with the various layouts I shared, you can view 7 unique layouts in the March 2015 For the Love of Half Square Triangles post.
Choose YOUR favorite layout and create a sweet little 24" x 24" quilt in a weekend.
Let's get started:
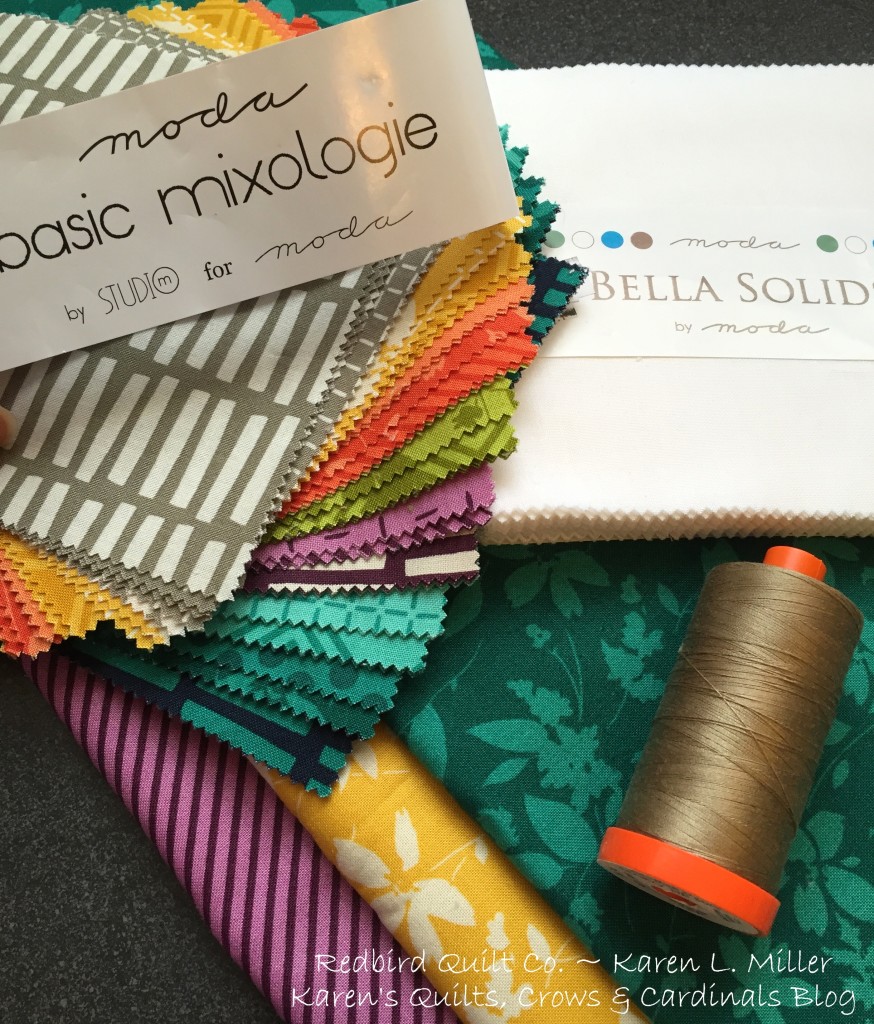
1 Charm Pack (print fabric)
- I used the bright, colorful, and modern Basic Mixologie by StudioM (33020PP)
1 Charm Pack (coordinating solid)
- I used Bella Solid White ( 9900-98PP)
1 Yard Backing Fabric
- I used Basic Mixologie Mustard (33021-29) 30" square
1/5 Yard Binding Fabric
- I used Basic Mixologie Violet (33025-19)
1/6 Yard Binding Accent/Flange Fabric (Optional)
- I used the leftover Basic Mixologie Mustard fabric (above)
Thread Choices: You KNOW I love Aurifil thread! Here are the weights and colors I used on this project:
- Aurifil 50Wt Piecing #2370 & 2024
- Aurifil 40Wt Quilting #2105
- Aurifil 12Wt Top Stitch #2105 Machine Binding #2520
Note:
A detailed tutorial for preparing and sewing the Half Square Triangles is found in the Chevron with a Twist recipe. Be sure to jump over to that primer for help at any time.
Chevron Shuffle Half Square Triangles:
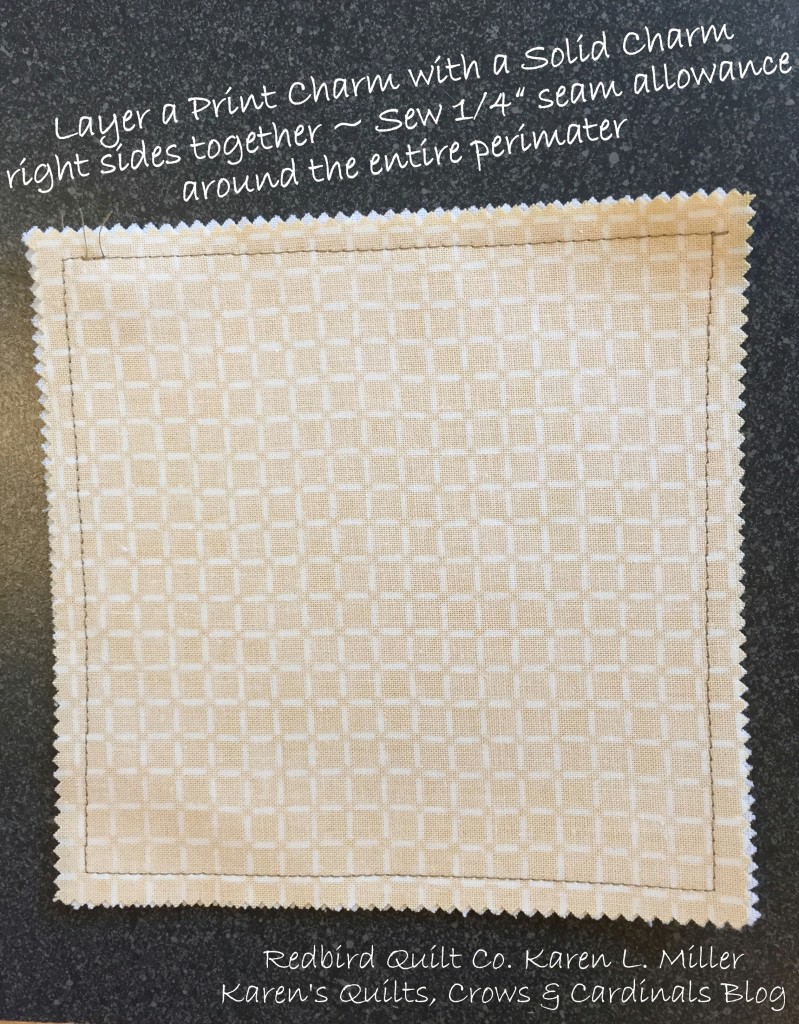
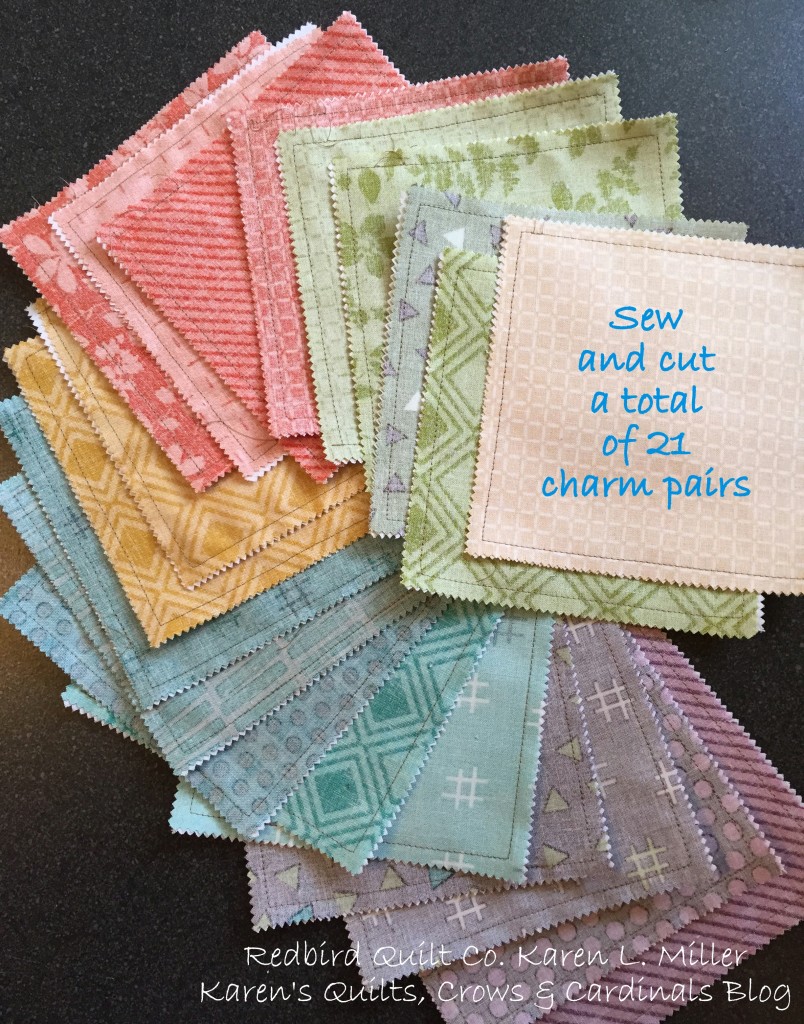
Using fine thread, a print charm square and Bella Solid charm square follow the HST "perimeter" method as detailed in the Chevron with a Twist quilt.
Repeat the "perimeter" process for 21 charm pairs.
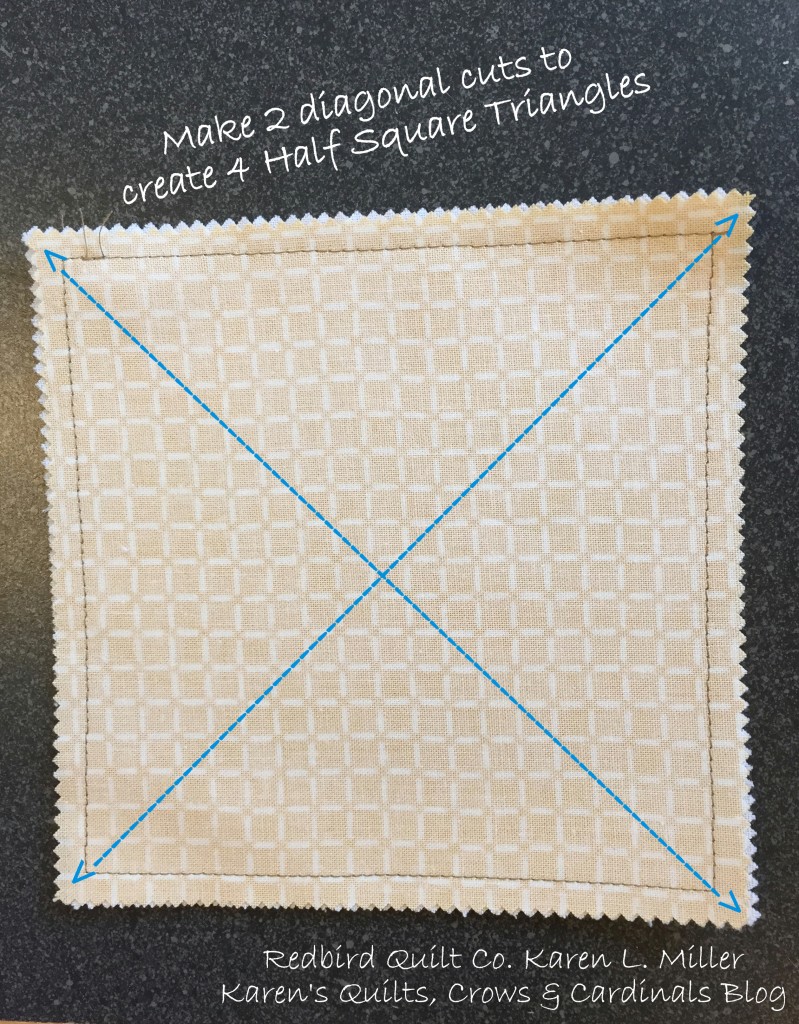
For each pair, make two diagonal cuts from corner to corner.
After cutting, unfold, finger press open, and iron each Half Square Triangle - Yields 4
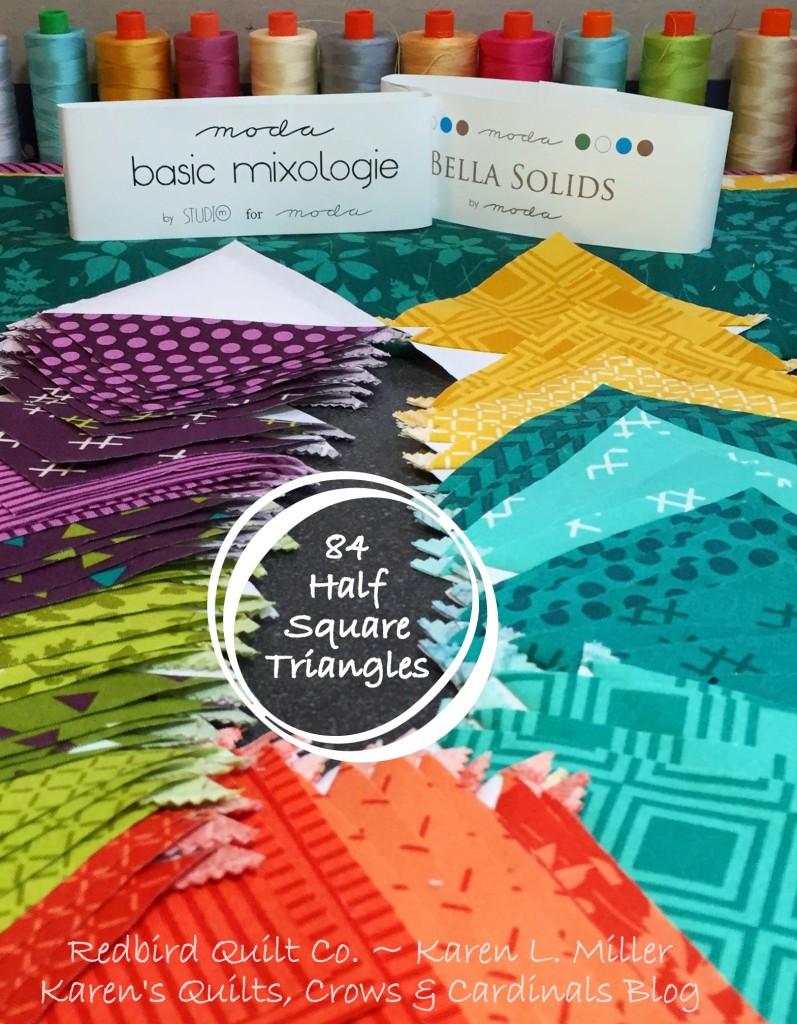
When you complete the perimeter sewing and diagonal cuts, you'll have a total of 84 Half Square Triangles.
Aren't those Basic Mixologie colors and prints luscious?
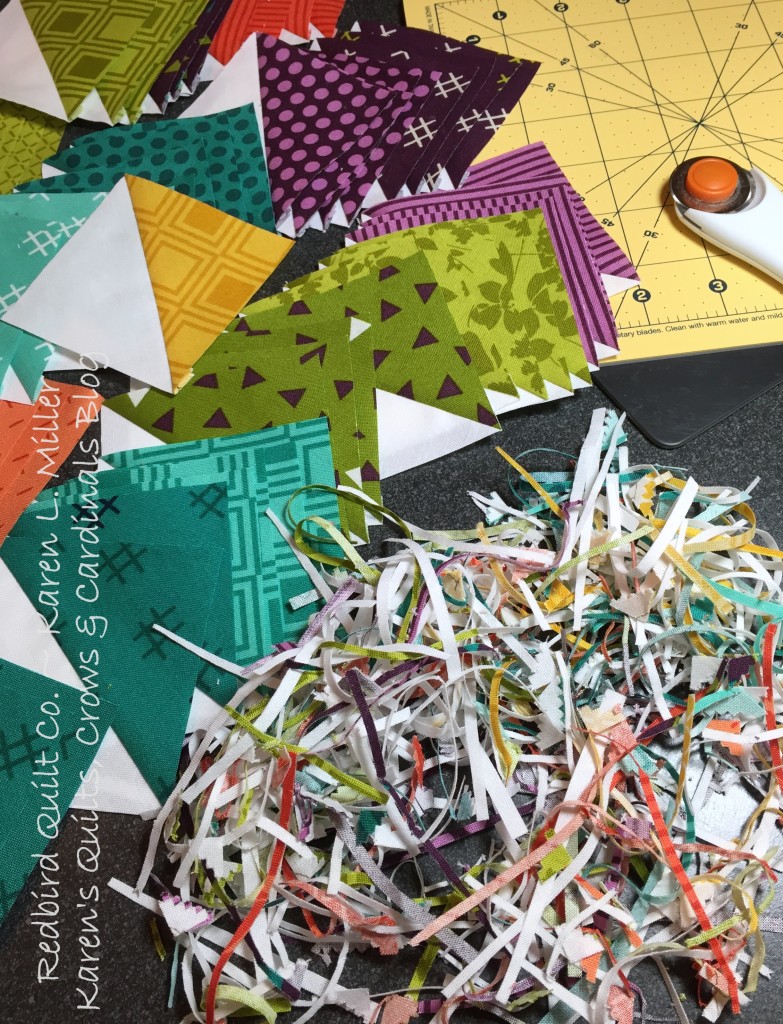
Next step: Trim each HST to 3" square.
A rotating cutting mat comes in handy here!
Arrange the half square triangles in a layout that is pleasing to you.
The Chevron Shuffle quilt was arranged in the "Focus" layout as shown in the March 2015 For the Love of Half Square Triangles post.
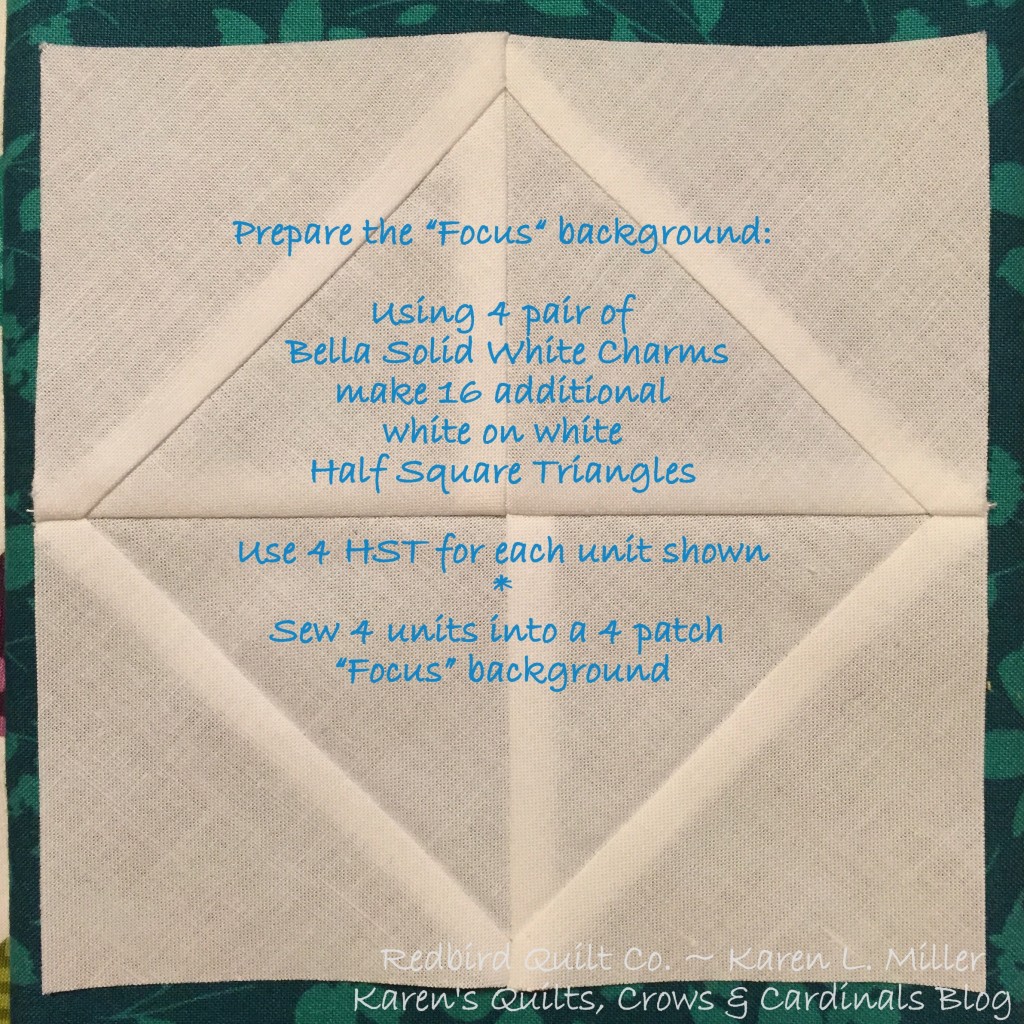
Prepare the "Twist" or "Focus" block:
I used the perimeter method with 4 pair of Bella Solid white charms to create 16 HST's for this block.
Alternately, cut a 10.5" square of fabric for the background.
Be sure to switch to Aurifil color #2024 when piecing the white-on-white HST's.
In all the excitement of piecing that "focus" block I failed to take a picture of the 4 units sewn together. You can get a general idea of the layout in the next few images.
Lets Twist - the Basic Mixologie Way!!!
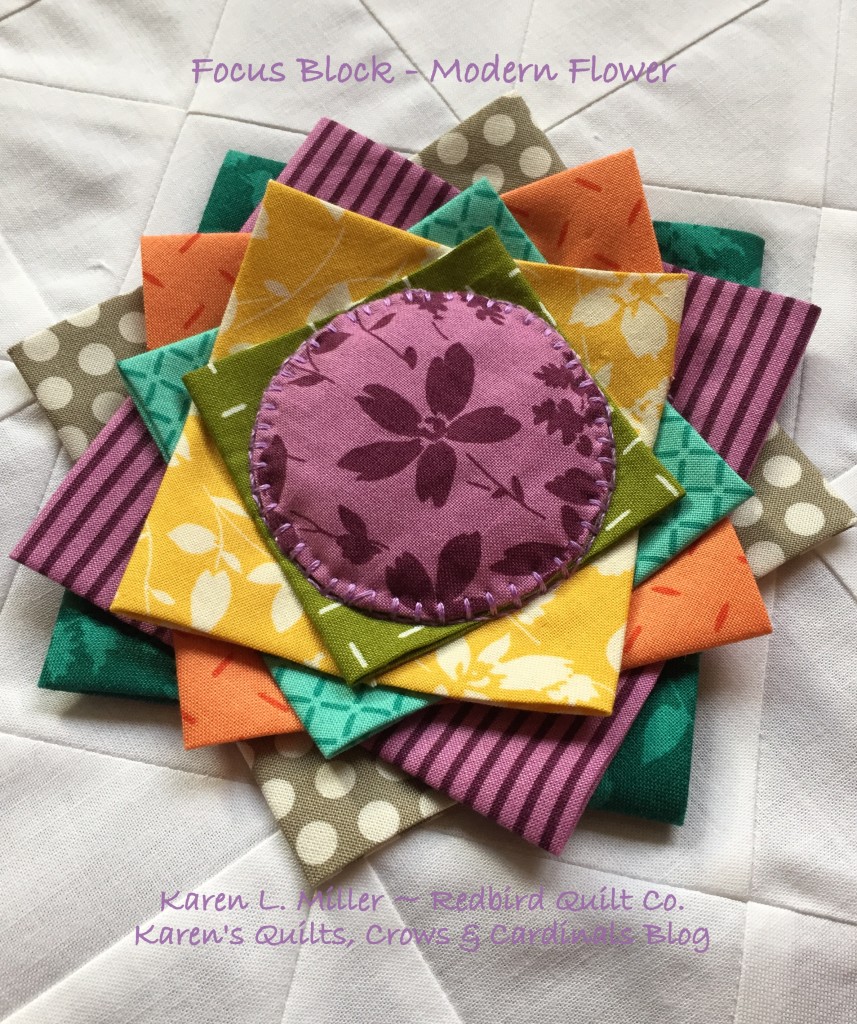
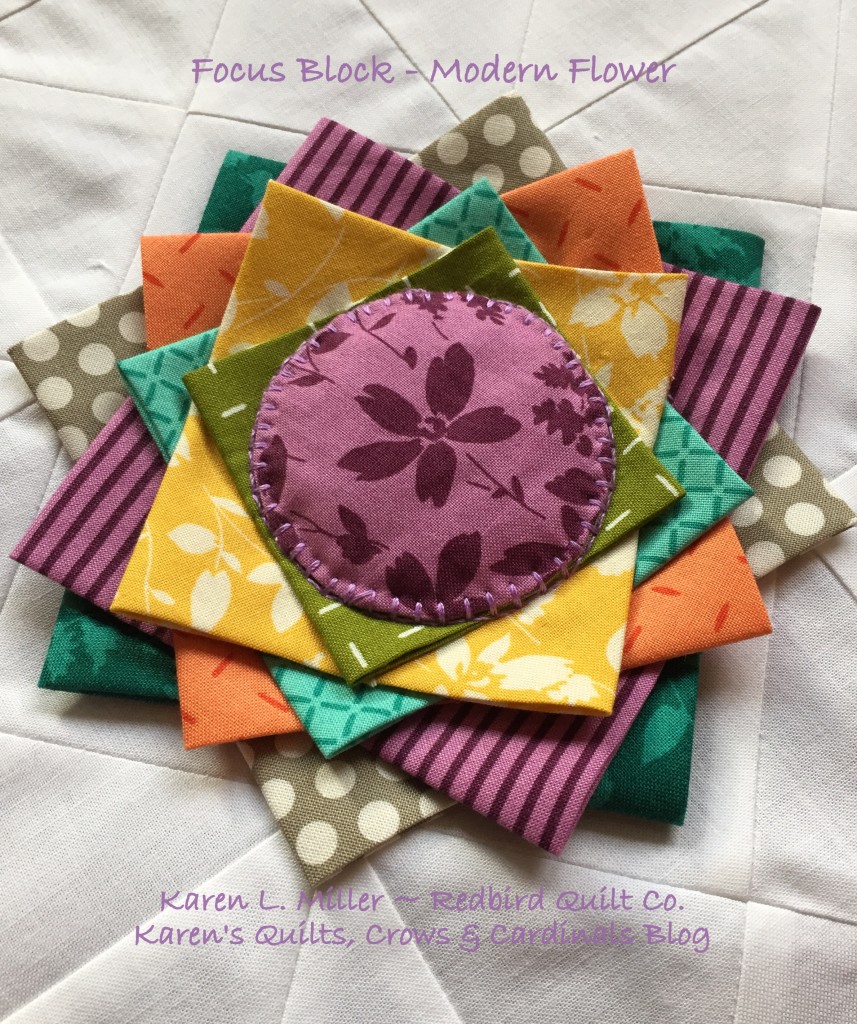
Because Basic Mixologie is such a modern fabric, I decided to steer clear of traditional applique instead layering a more modern flower in the focus block.
Begin by choosing 8 print charms to prepare the modern flower focus block. (We've only used 21 so far, so there are plenty to choose from).
For the bottom 6 layers, cut the print charms into (4) 2.5" mini charms.
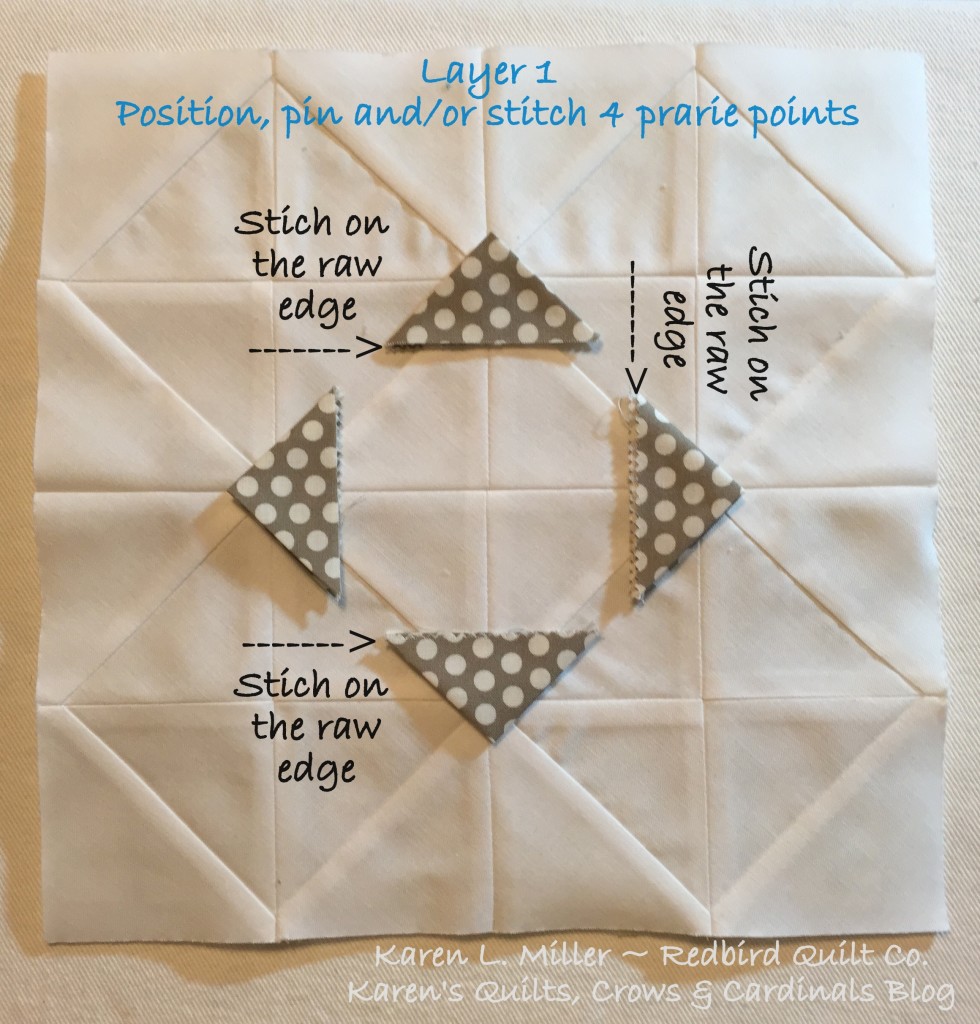
For each mini charm, fold diagonally twice to create a folded fabric triangle (a prairie point).
Position 4 prairie points in the center of the "focus" block and pin in place.
I positioned my first set of points appx 1/2" outside the seam. Once you're comfortable with the layout, pin or stitch to secure. I positioned two layers before stitching.
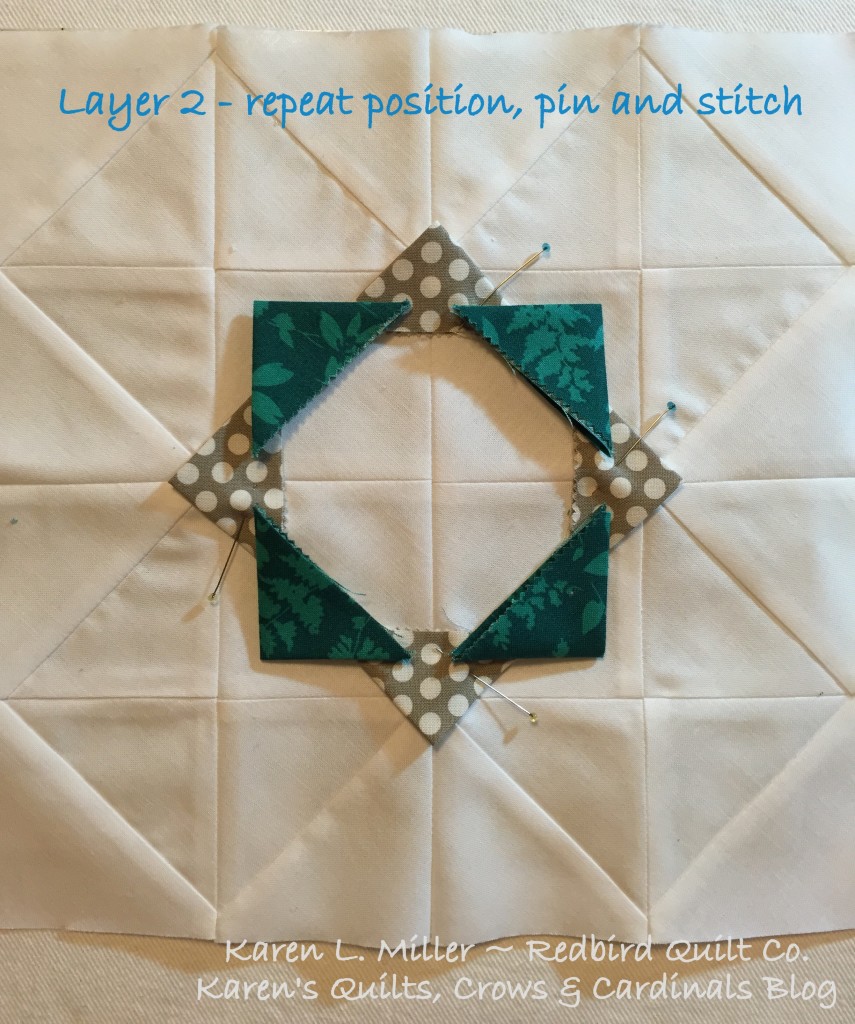
Position the 2nd layer and pin.
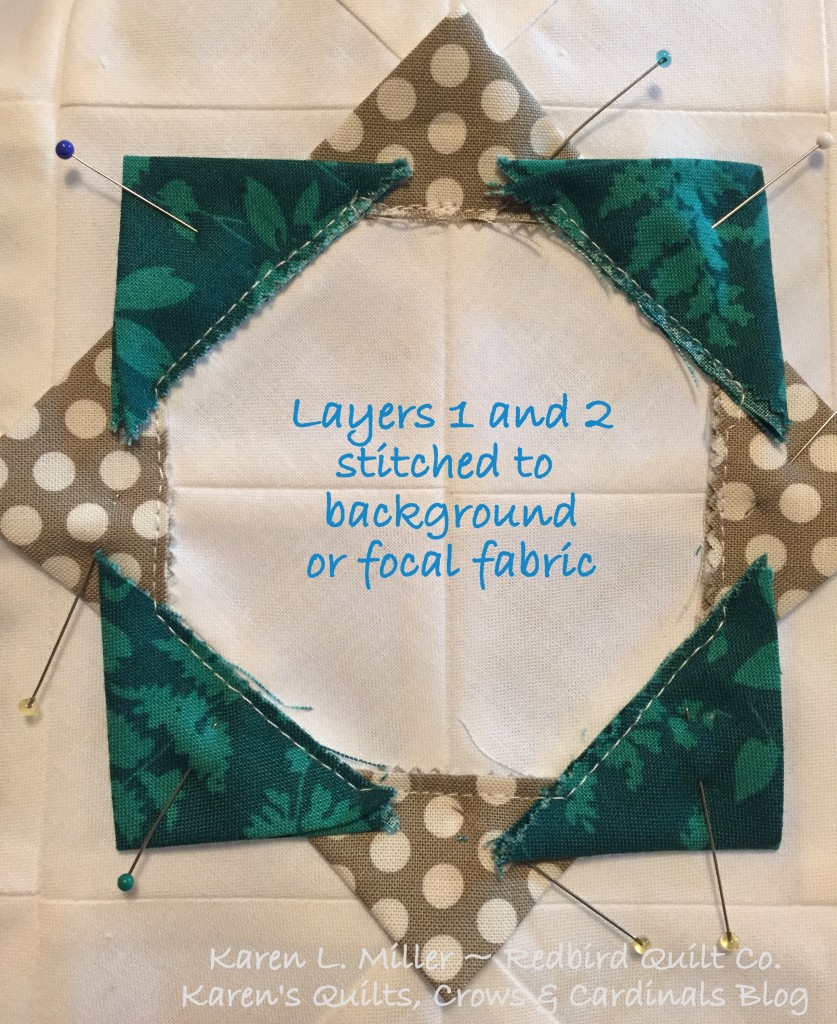
Use a straight or zig-zag stitch to secure the points to the background fabric. It's important to stitch close to the raw edge of the prairie point to avoid seeing the stitching lines later.
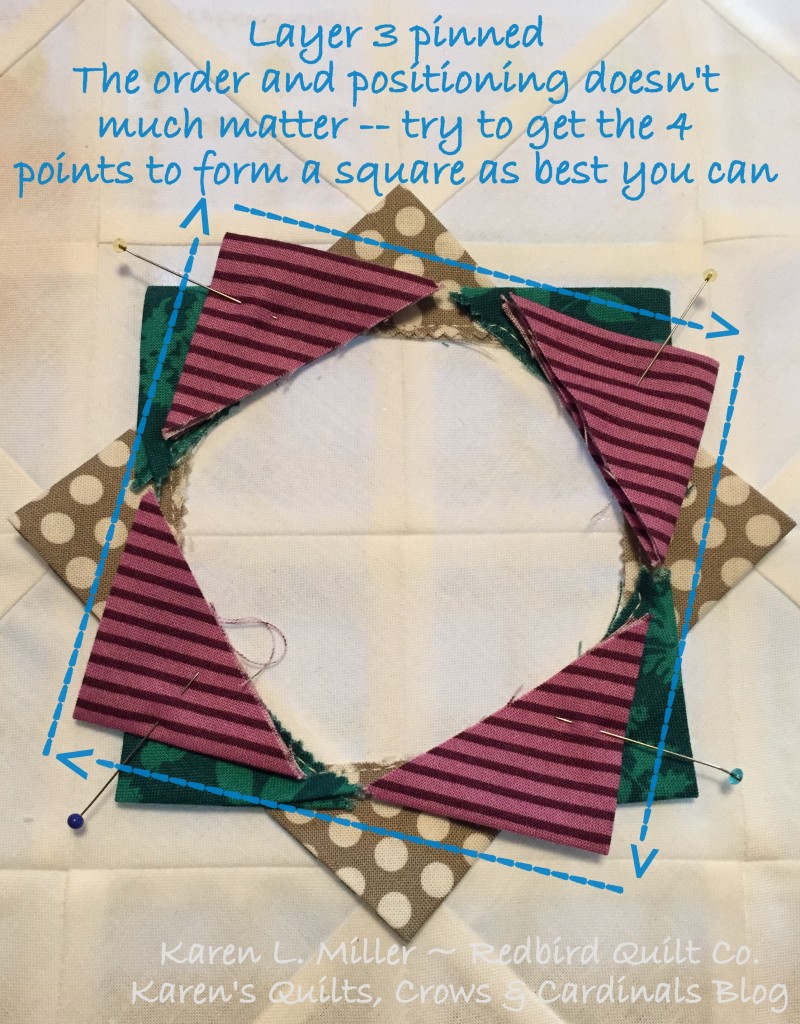
Prepare layer 3.
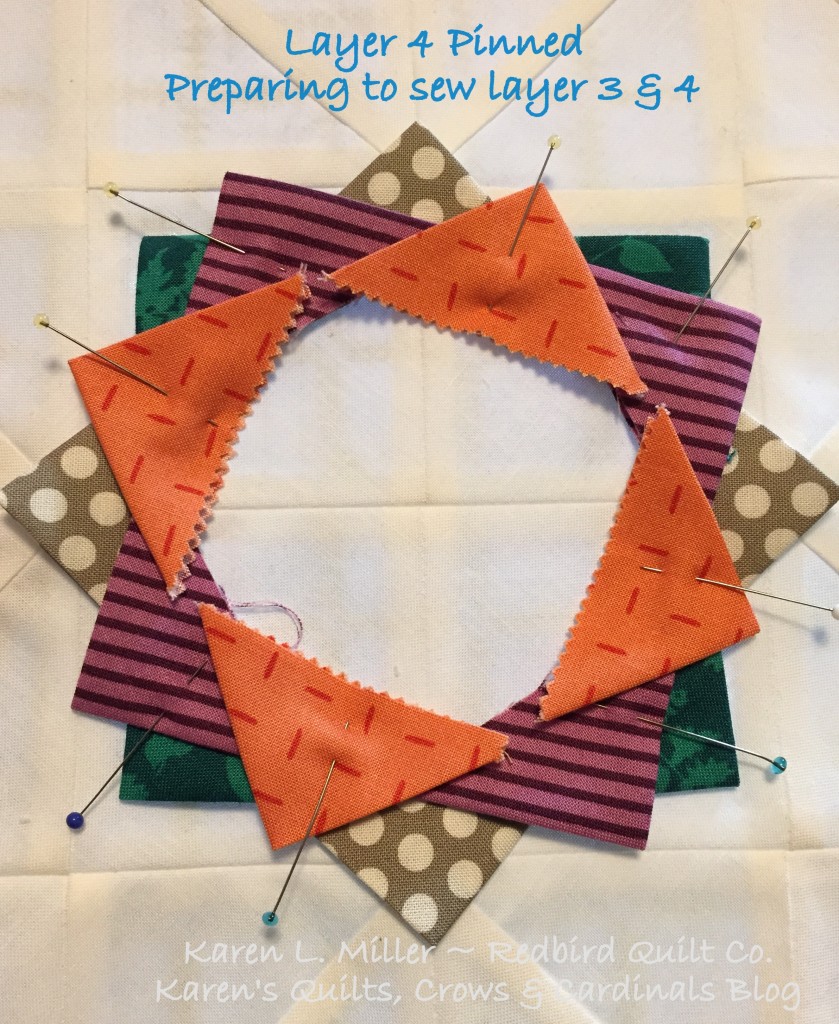
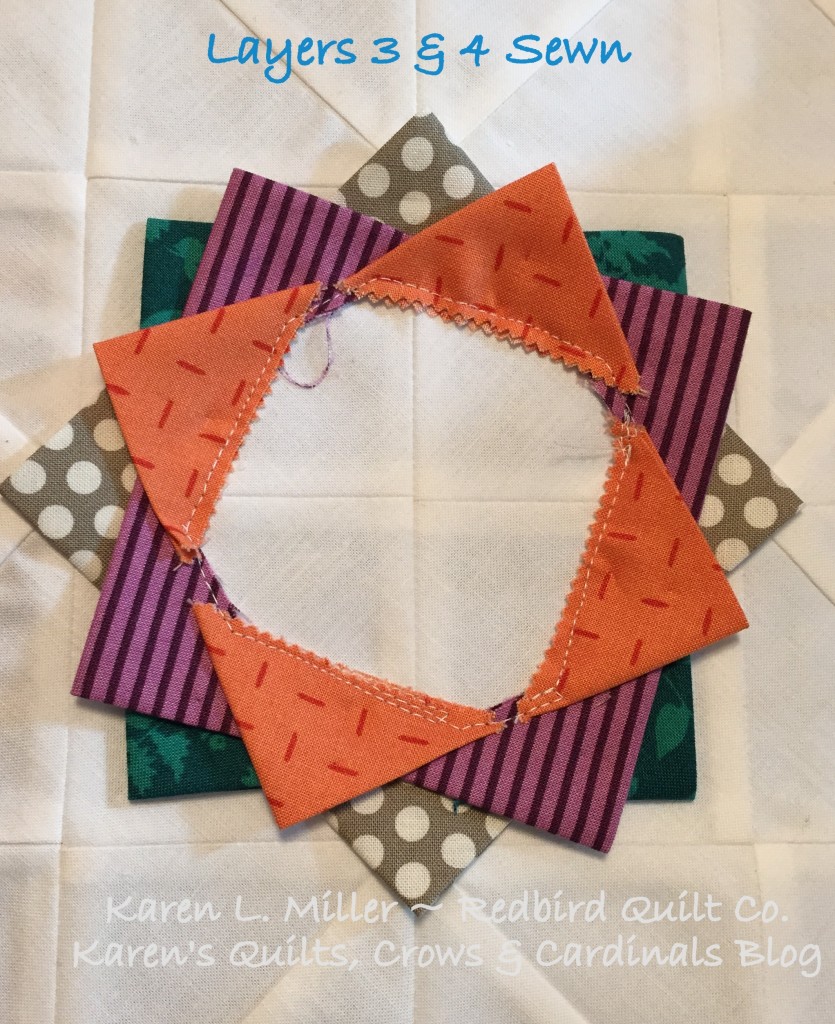
Continue positioning and stitching additional layers of points to create a modern flower.
Layer 3 & 4 stitched.
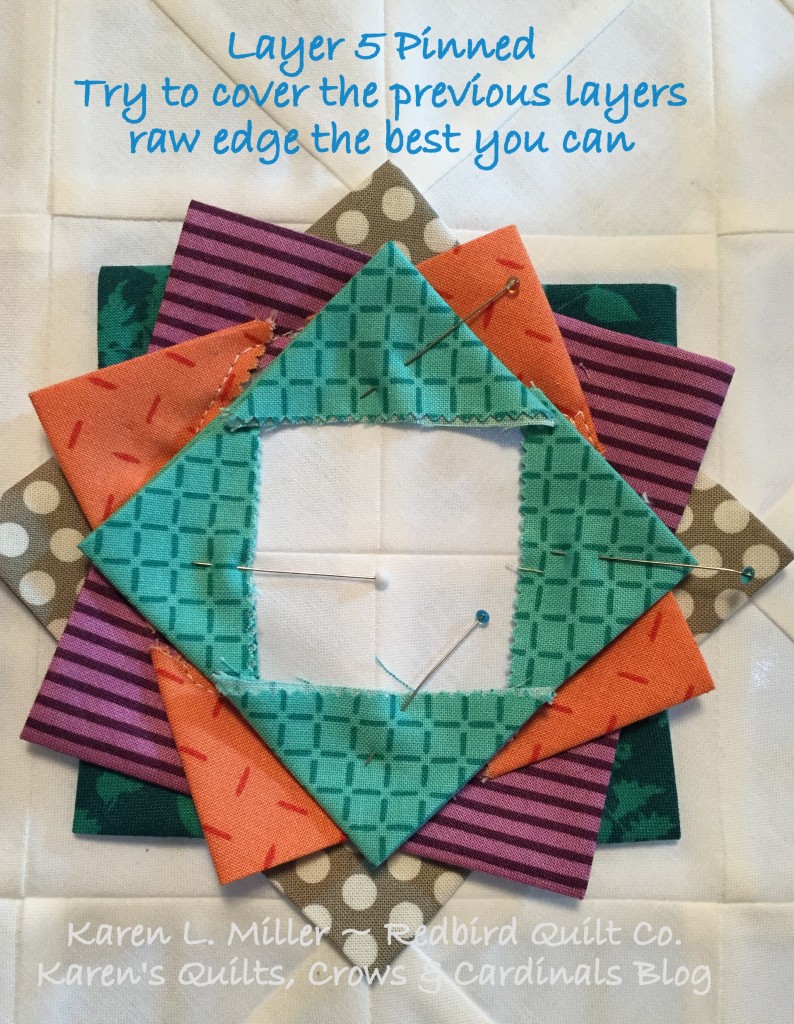
Prepare layer 5
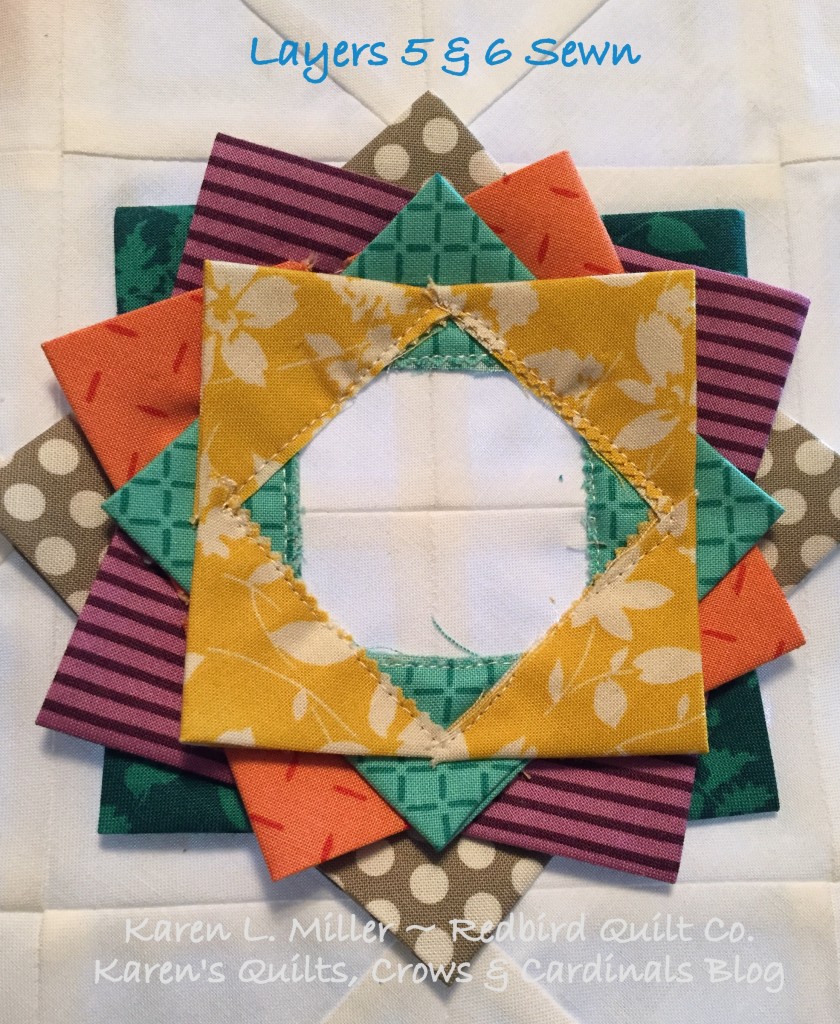
Layers 5 and 6 stitched.
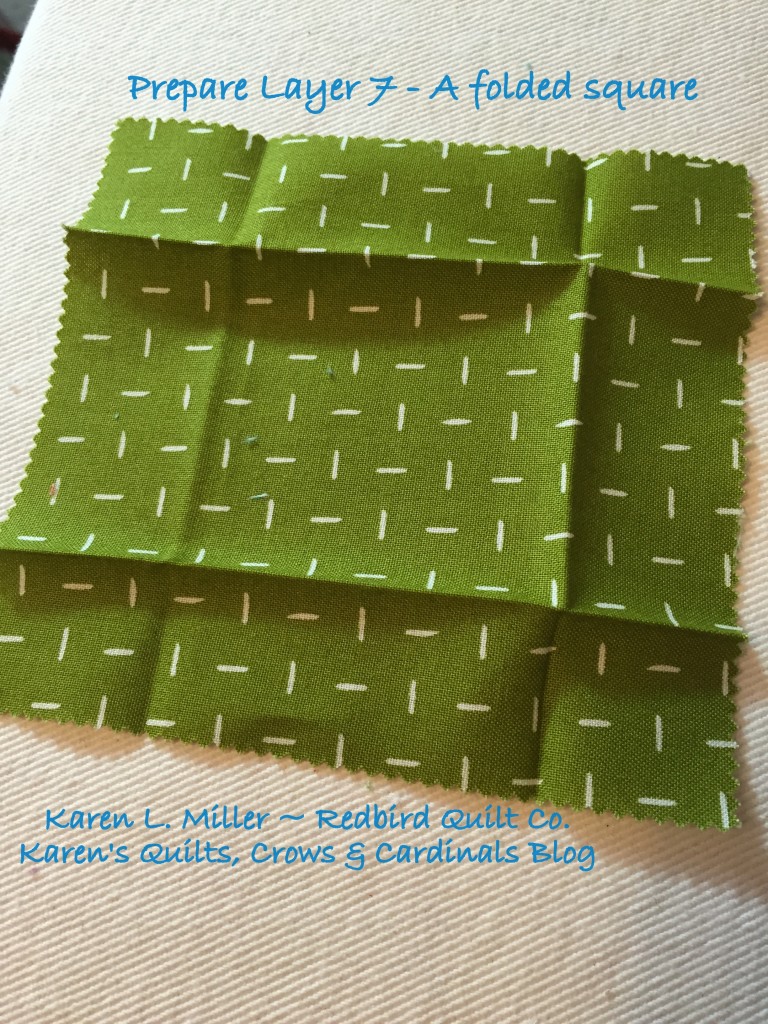
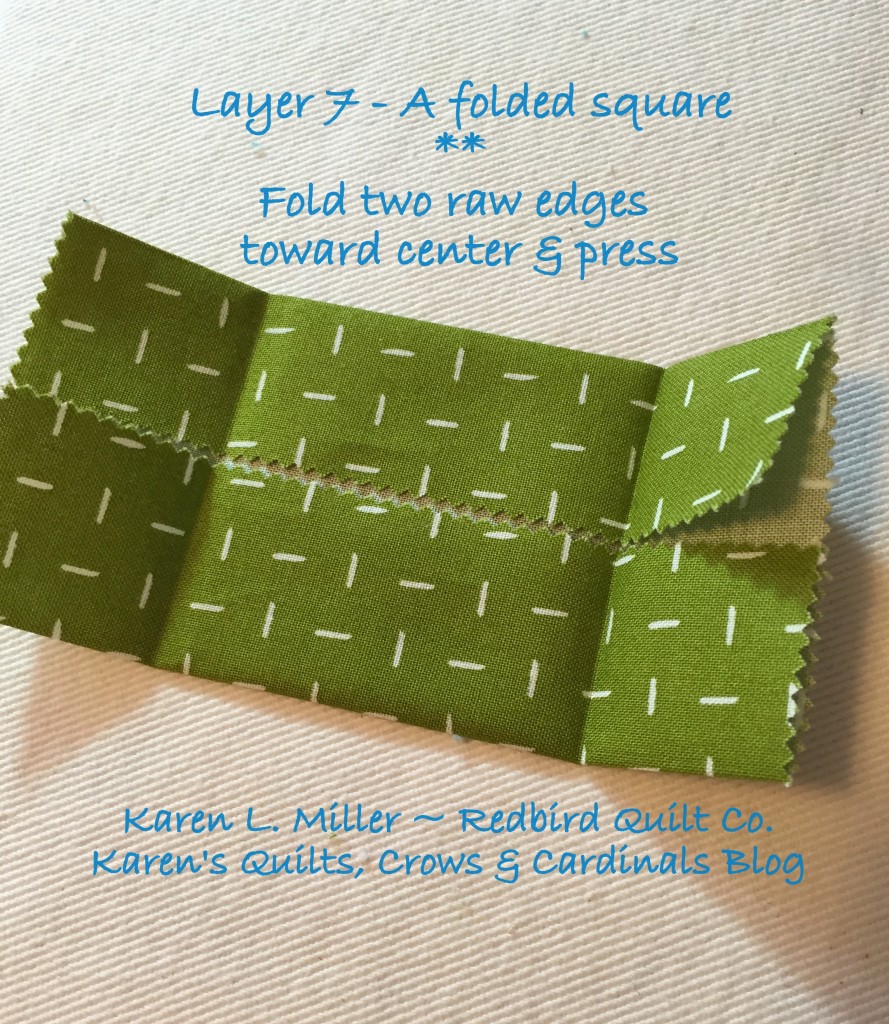
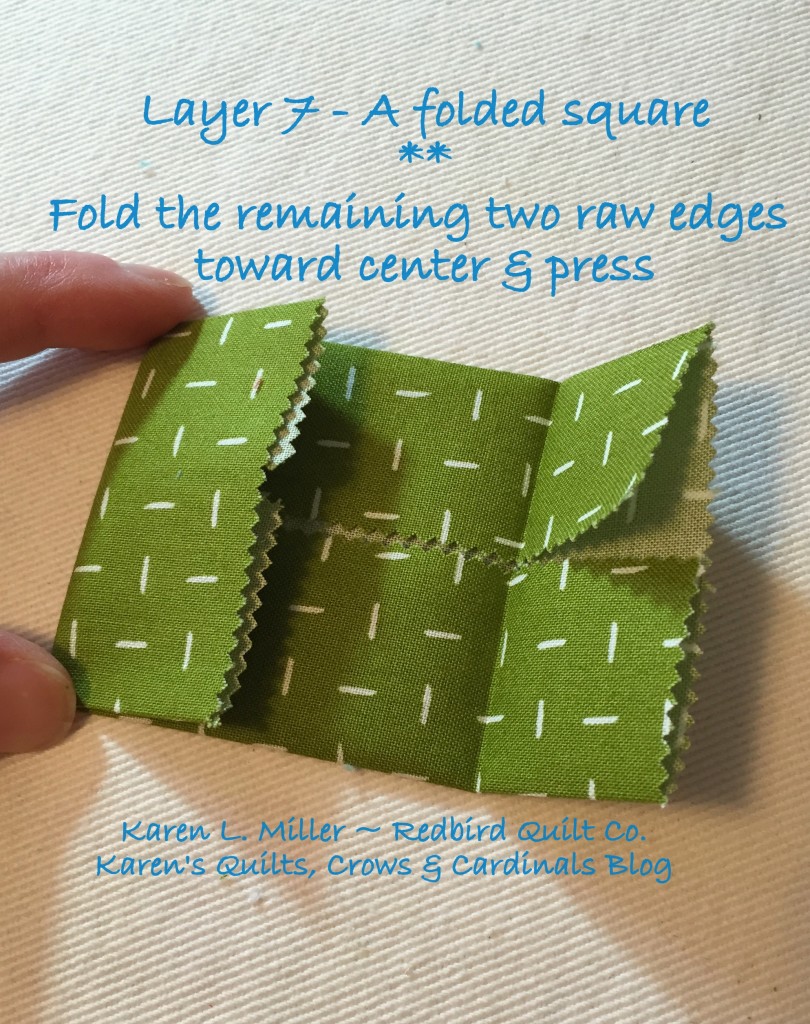
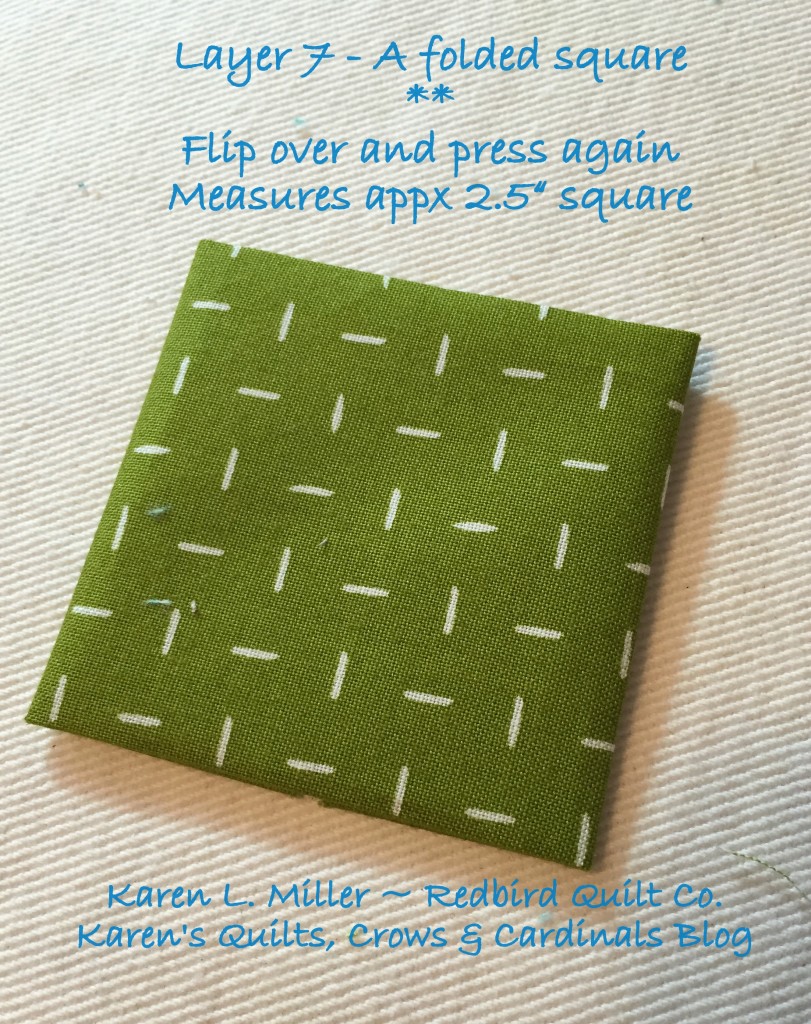
After stitching 6 layers of folded fabric triangles, I created the 7th layer using a 5" charm folded like this:
Here are the steps to fold layer 7.
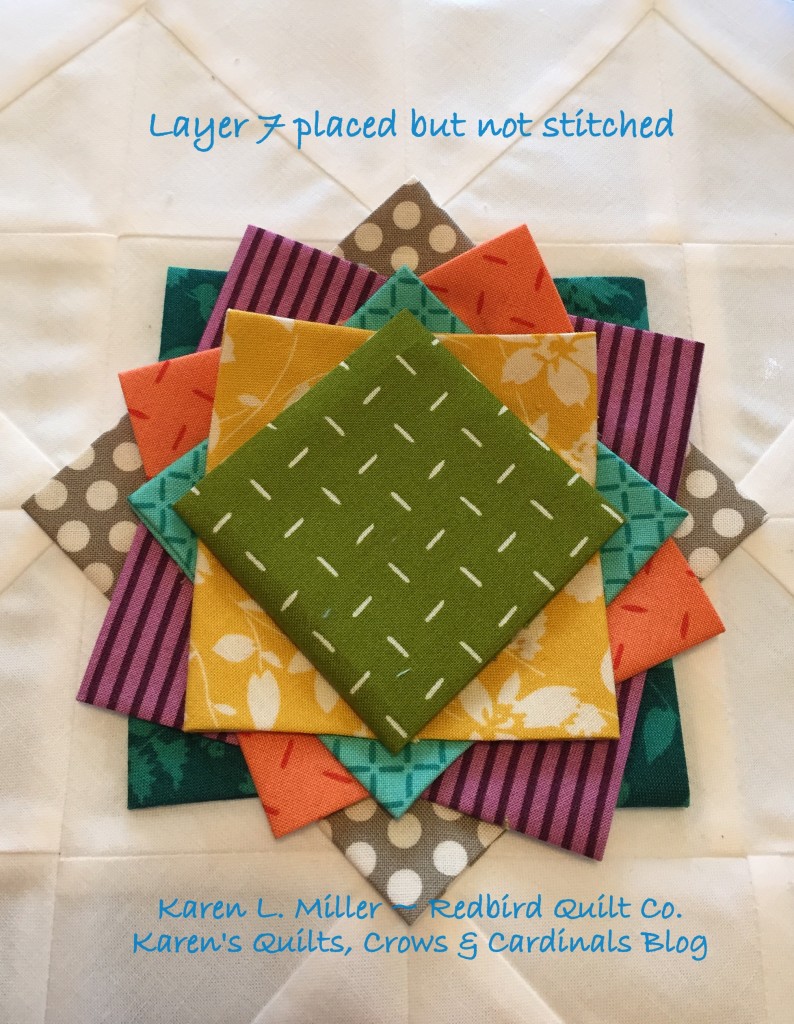
Layer 7 positioned but not stitched.
On the 8th or top layer I created a fussy-cut applique penny using {my term} the inside out method and including a layer of batting to give some dimension to the penny.
There's a great Moda Bake Shop recipe for a fusible variation of this method here: Turned Edge Machine Applique by Kara Schorstein
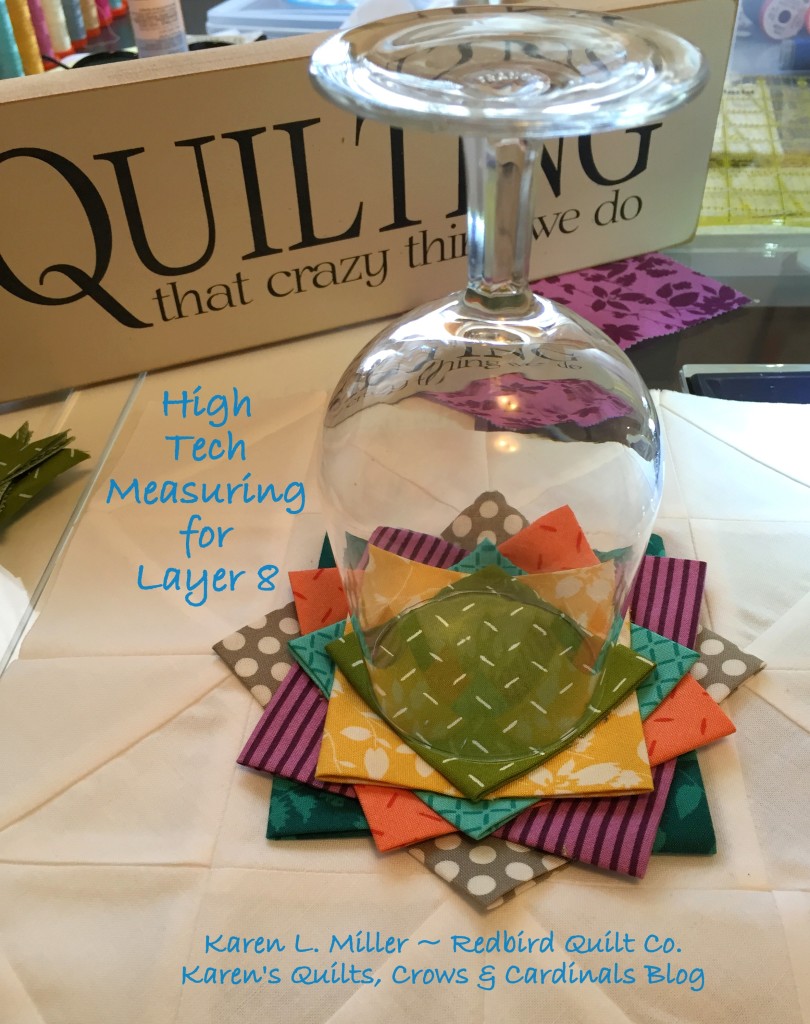
Start by finding something round that fits the size you need for the layer 8 penny.
This was convenient:
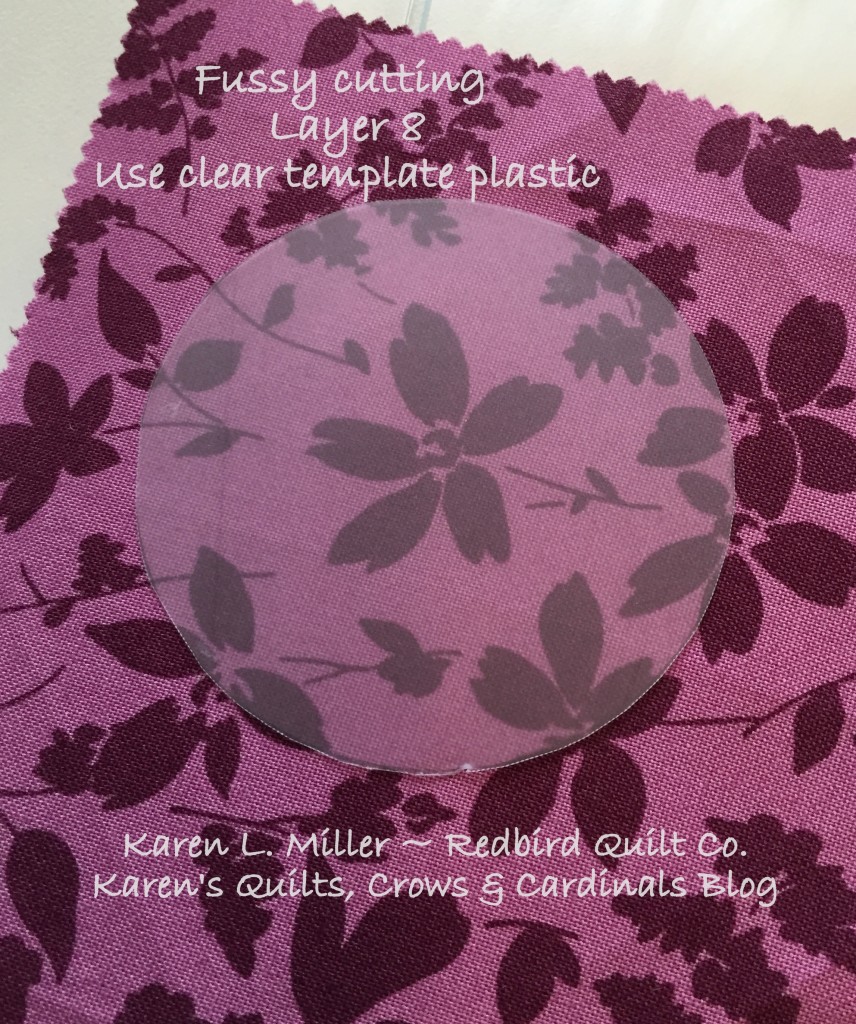
Now trace that circle onto a piece of clear template plastic and cut it out.
Position the template plastic over the layer 8 fabric to determine what section of the fabric you like best.
Fussy cutting is fun -- and can enhance a design significantly. Give it a try!
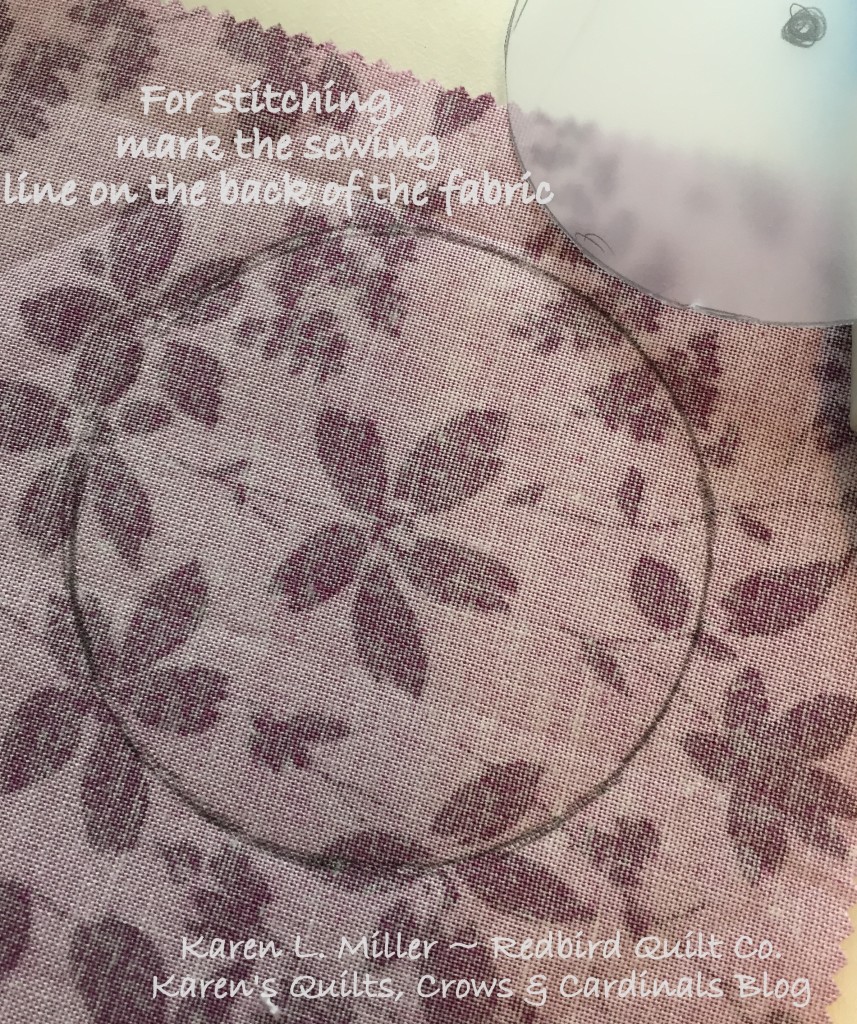
Now move the plastic to the wrong side of the fabric and trace the circle on the fabric (I used a pencil).
This will be your stitching line.
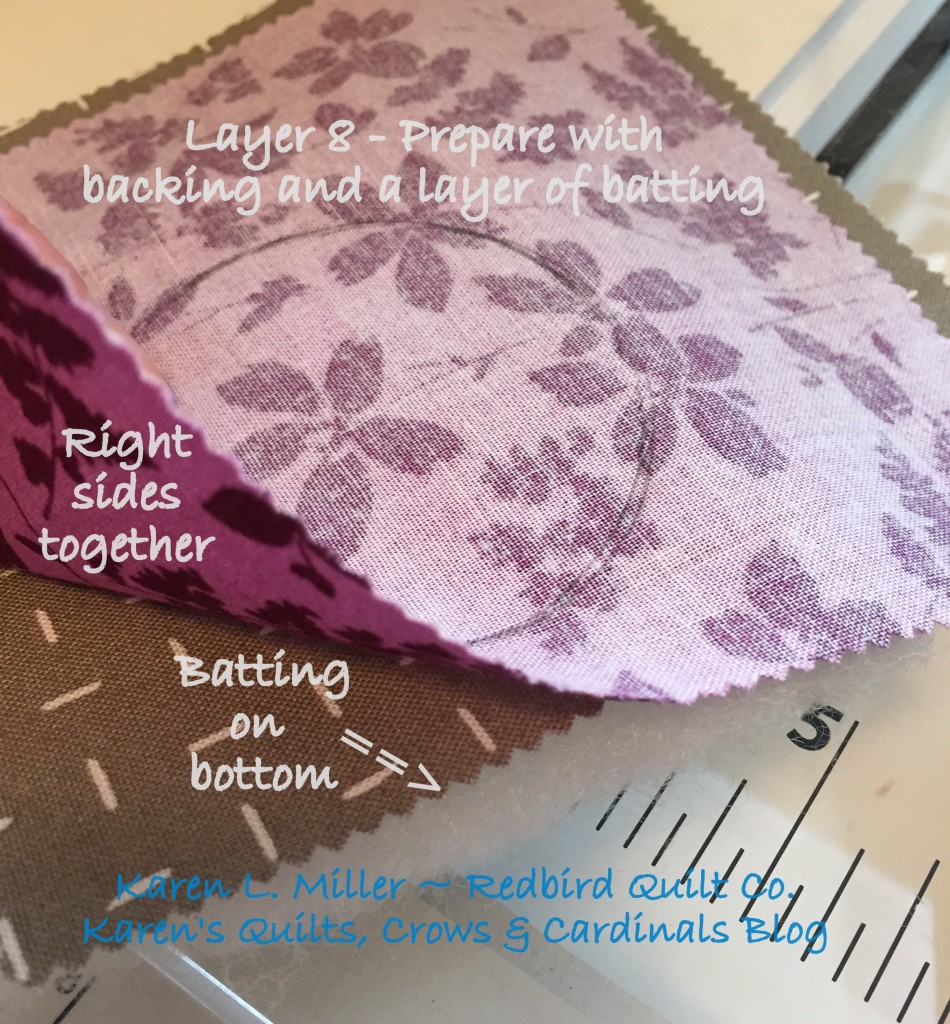
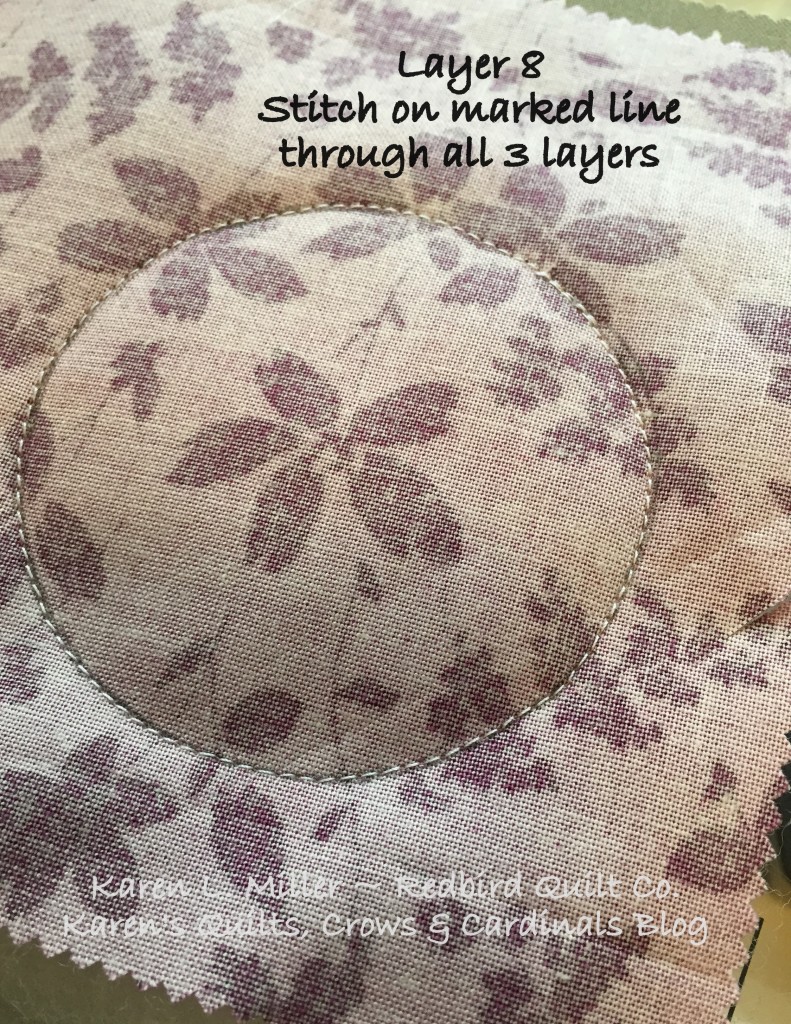
Next layer the layer 8 fabric with a piece of background fabric and a piece of batting
Stitch on the drawn line through all 3 layers
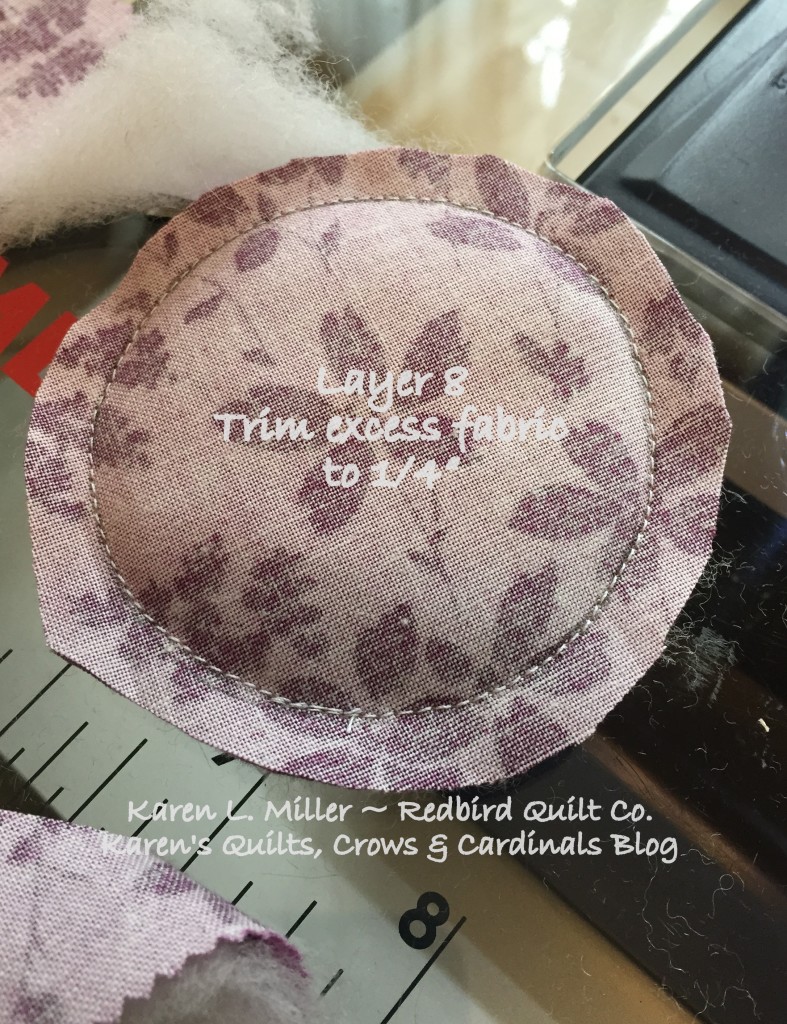
Trim excess fabric - leaving appx 1/4" seam allowance.
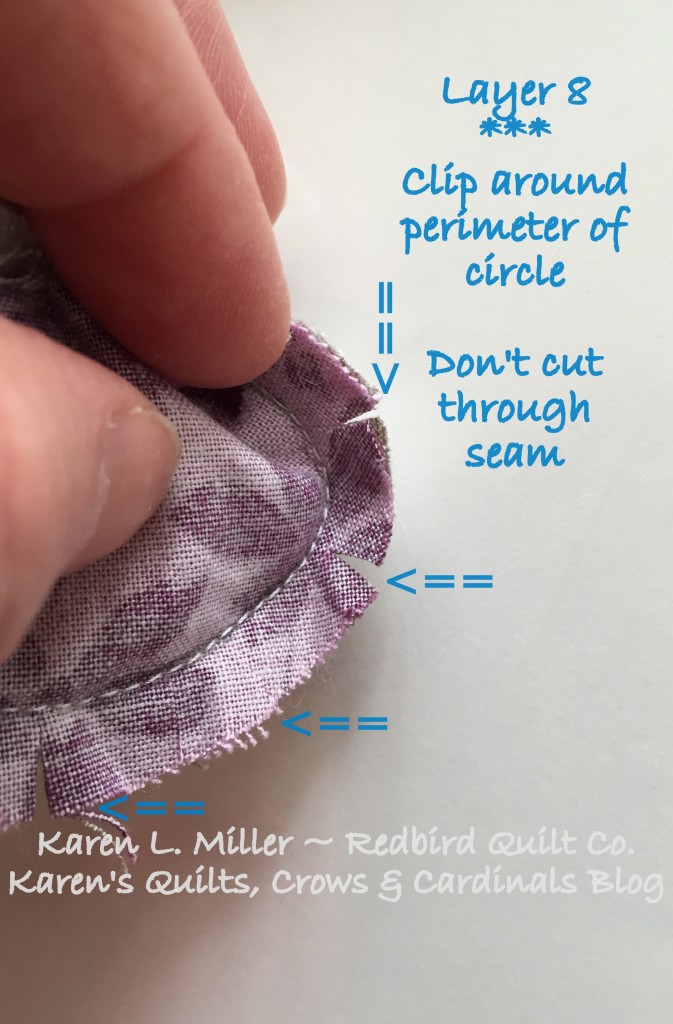
Make small cuts around the seam allowance to reduce bulk and allow for a smooth circular seam when turned right-side out.
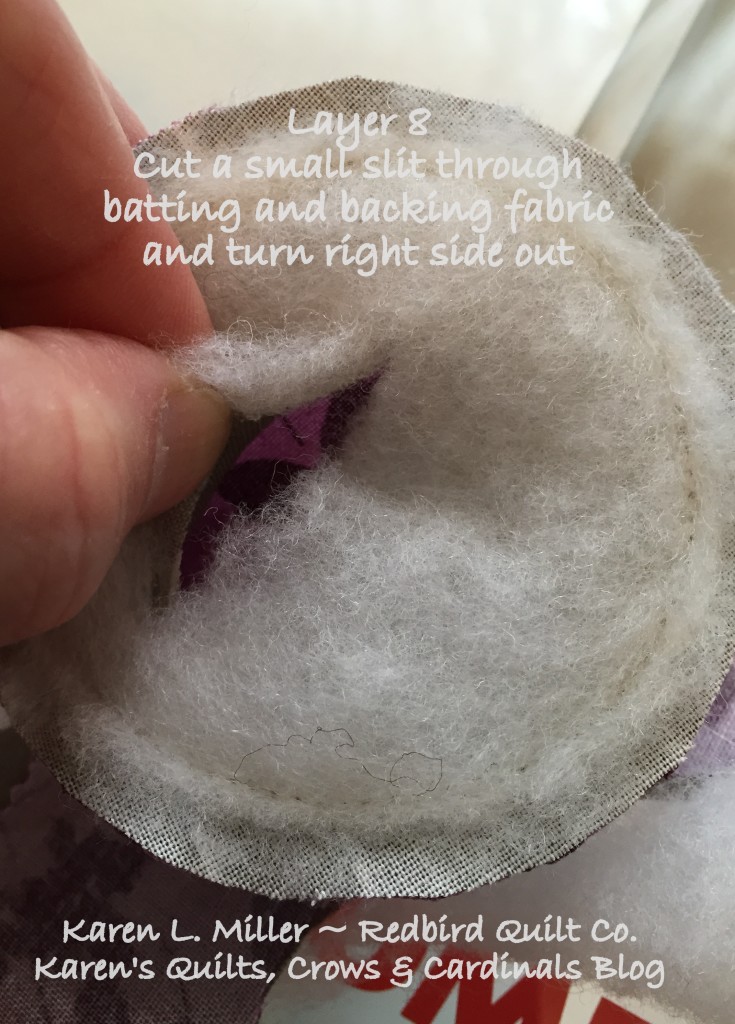
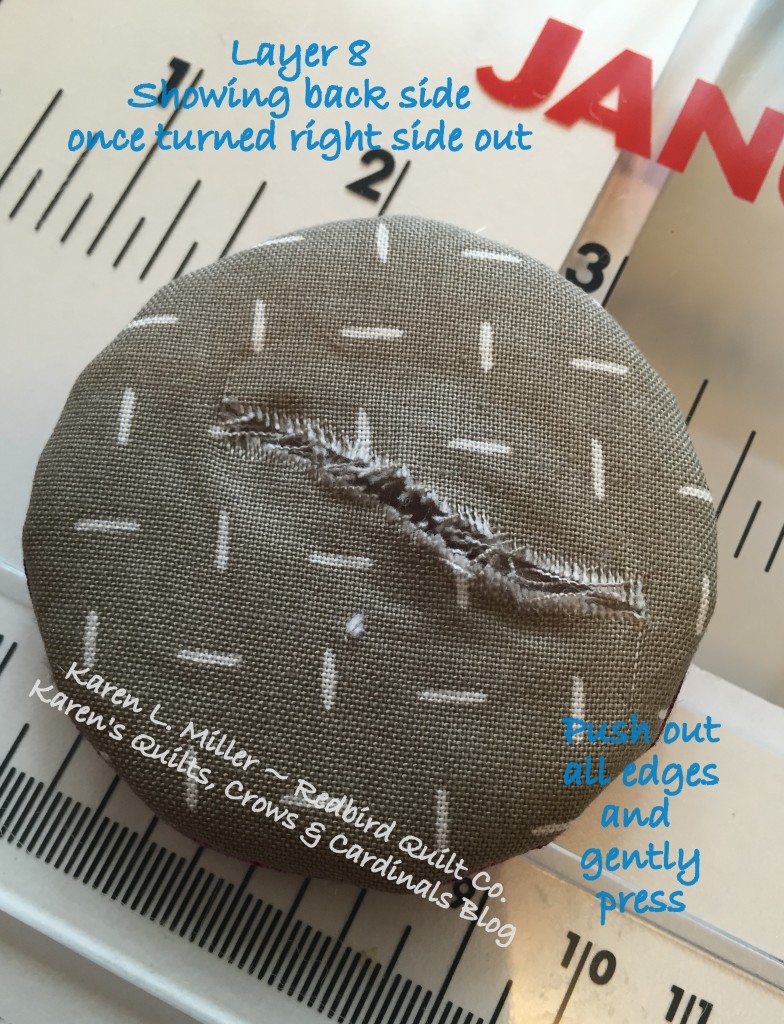
Make a small slit through the back of the penny. Cut through the batting and the background fabric only.
Use this small hole to turn the penny right-side out.
Showing the back side of the penny -- this will be appliqued to the modern flower so it will be hidden ;)
Woohoo, we're making progress!
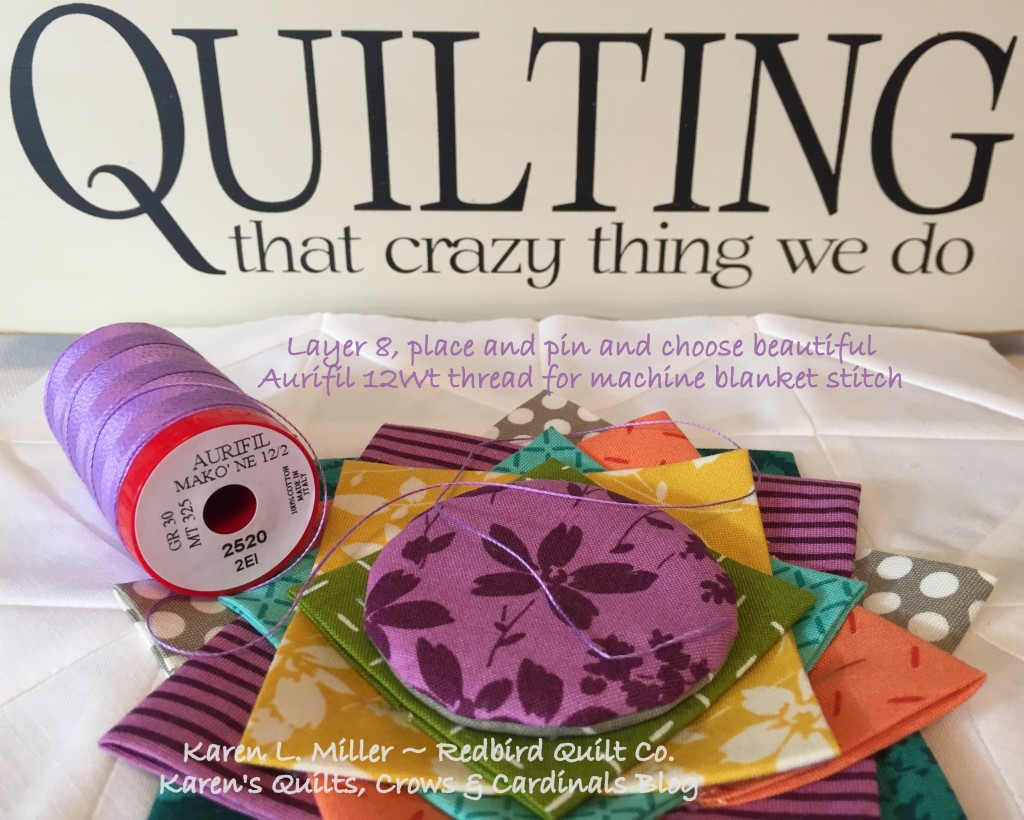
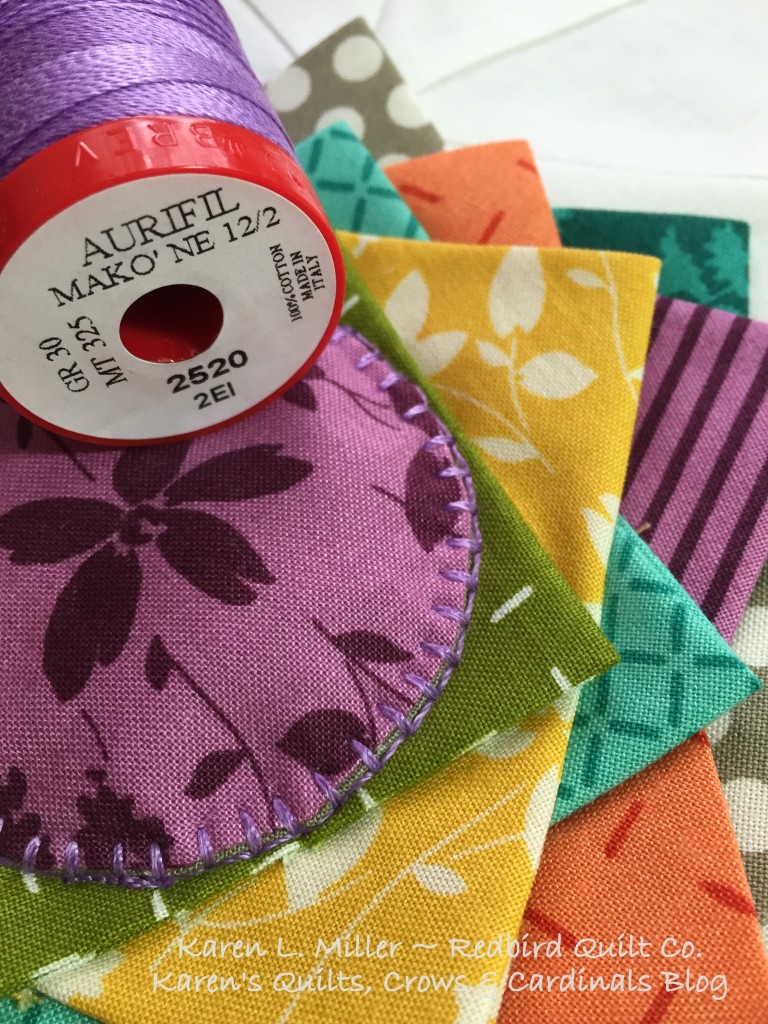
You're going to pickout some yummy Aurifil 12Wt thread to machine blanket stitch the Layer 8 penny!
Using a 90/14 needle, 12Wt thread in top and 40 or 50Wt in bobbin, stitch around the perimeter of the circle with the stitch of your choice. I used a machine blanket stitch but a straight or zig zag stitch would look awesome too!
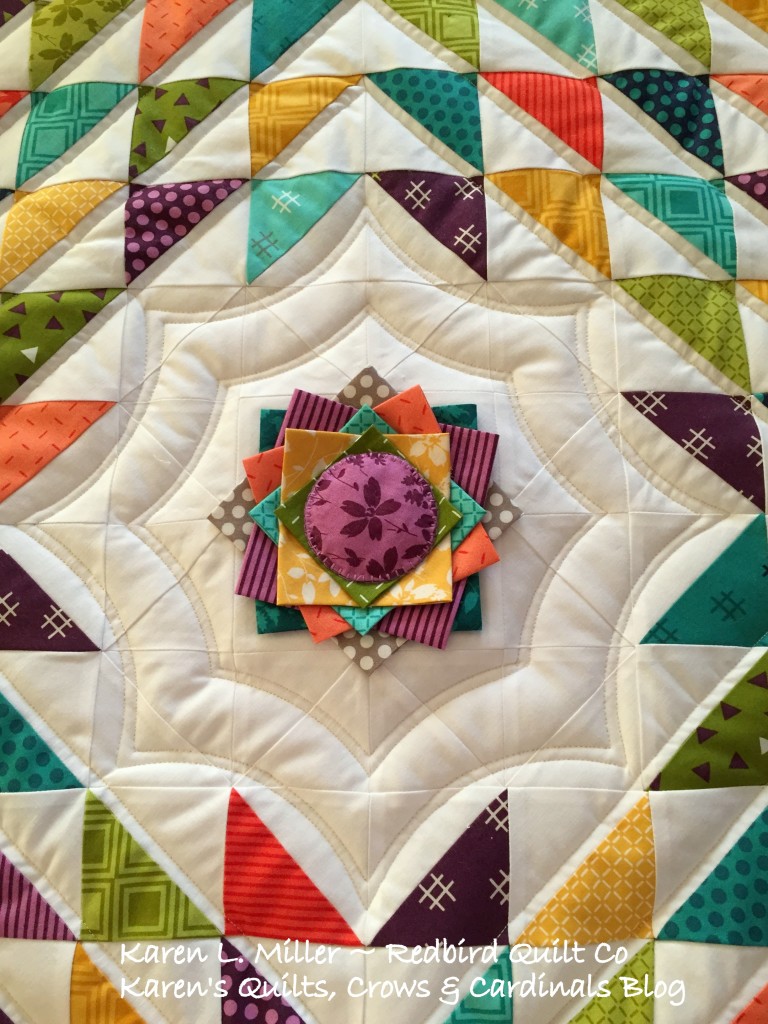
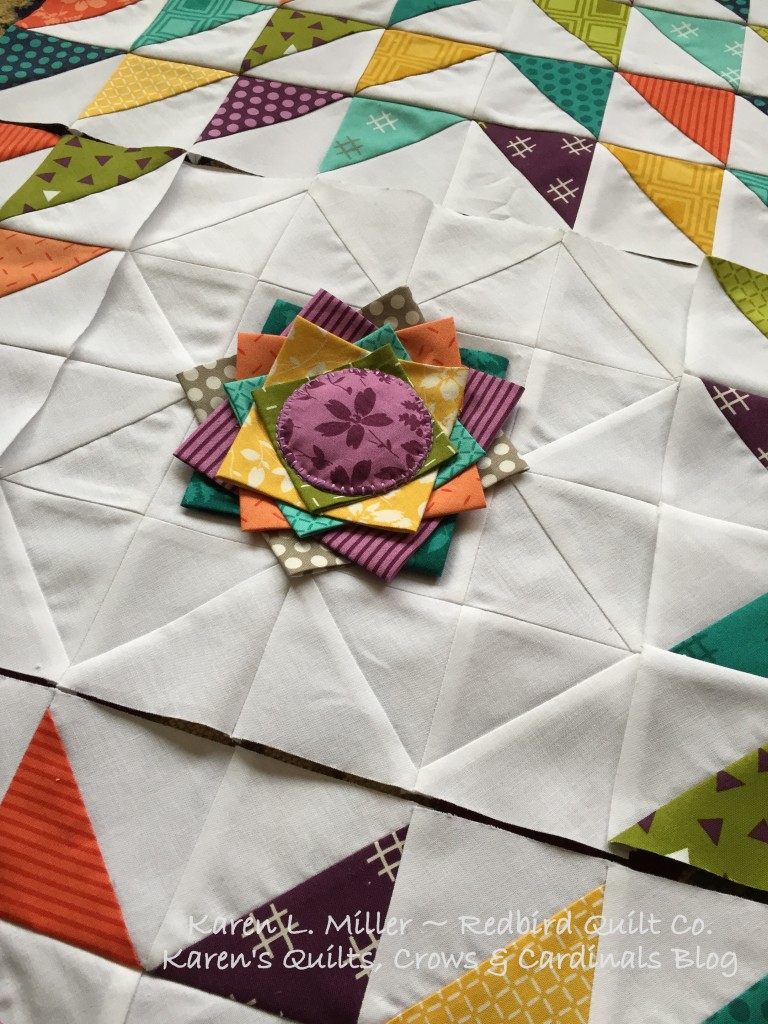
{Happy Dance} Your modern flower has bloomed!!
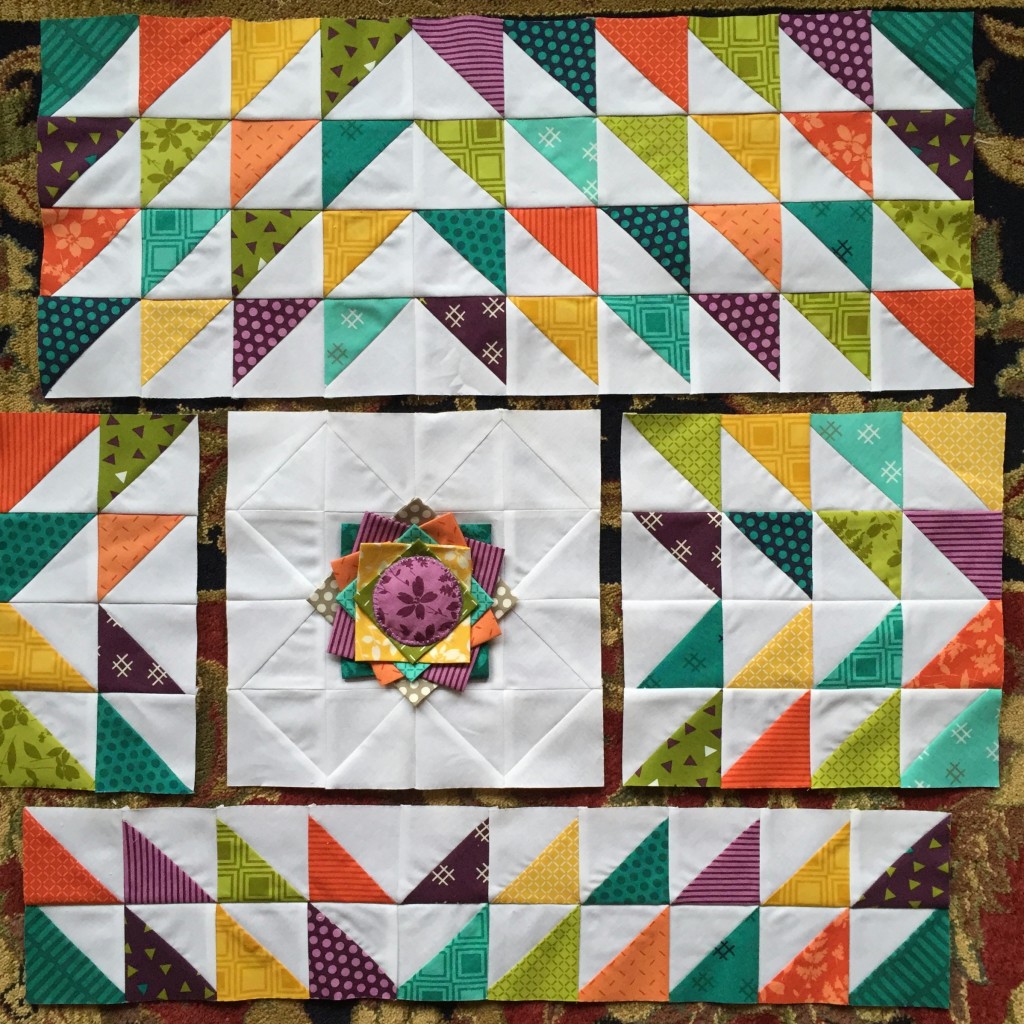
Once the modern flower is complete you'll want to sew the half square triangles into rows, and sew your rows together in sections as shown below.
Complete instructions for this step can be found on the original Chevron with a Twist recipe.
Now sew your middle sections to the focus block and then attach the top and bottom sections.
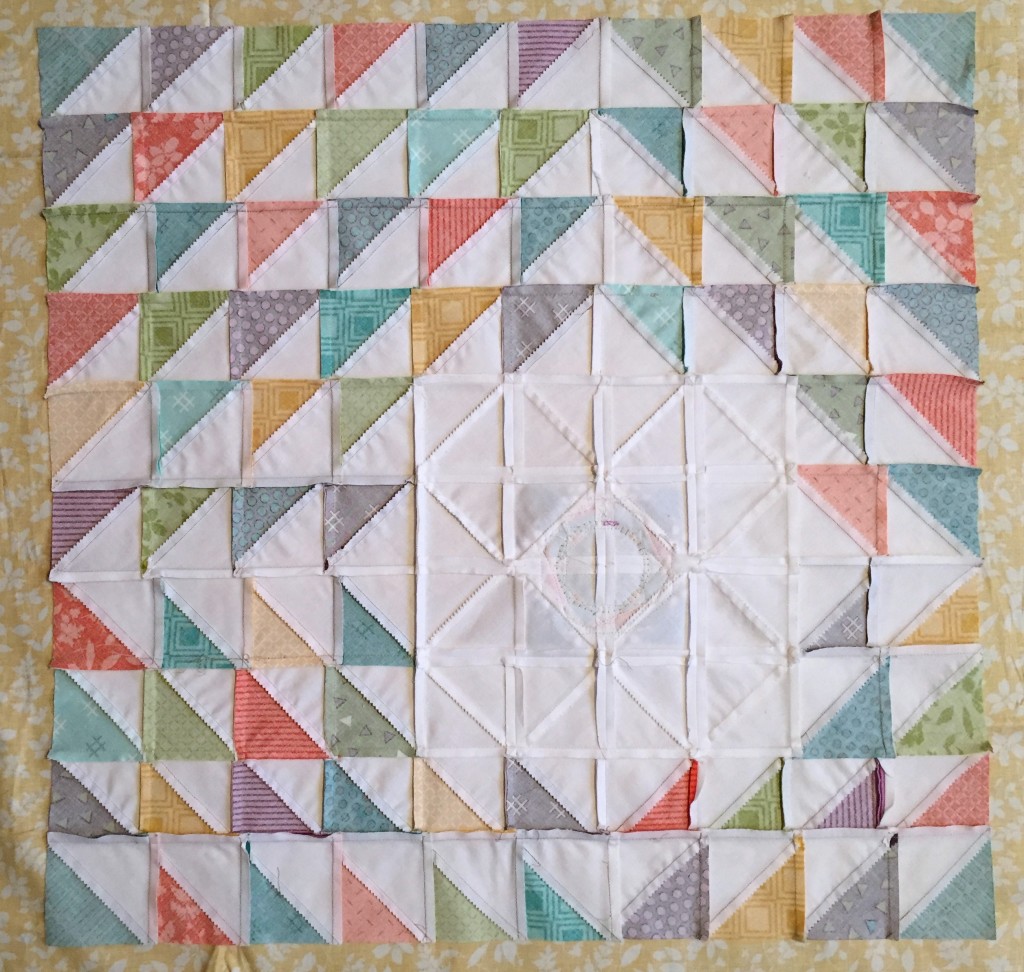
Here's the back -- I love looking at backs!
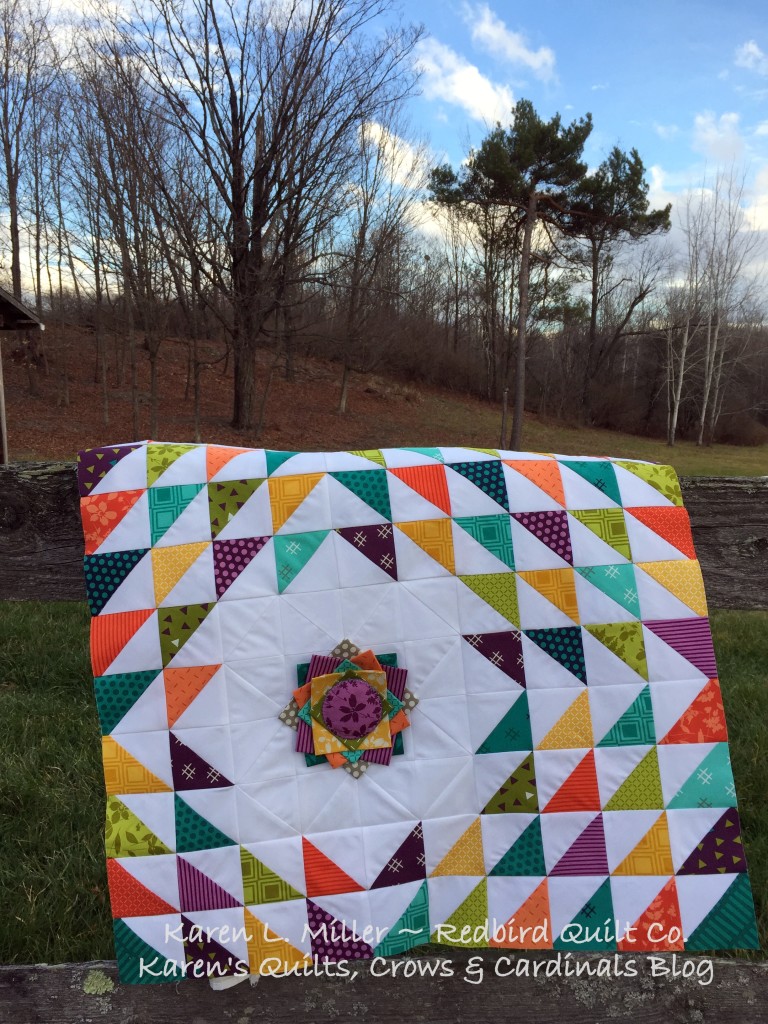
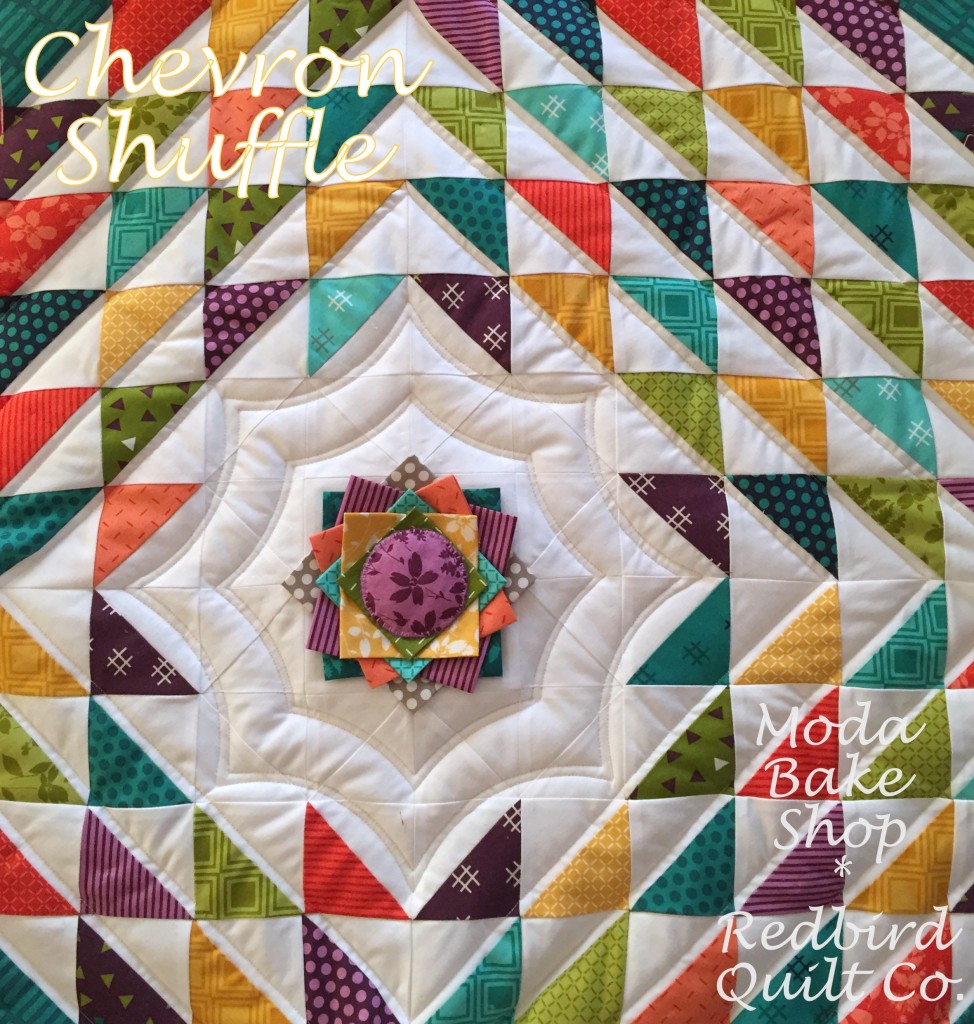
Woohoo! The Chevron Shuffle modern mini quilt flimsy is now complete. It should measure appx 25" square -- give or take ;)
Prepare to Quilt:
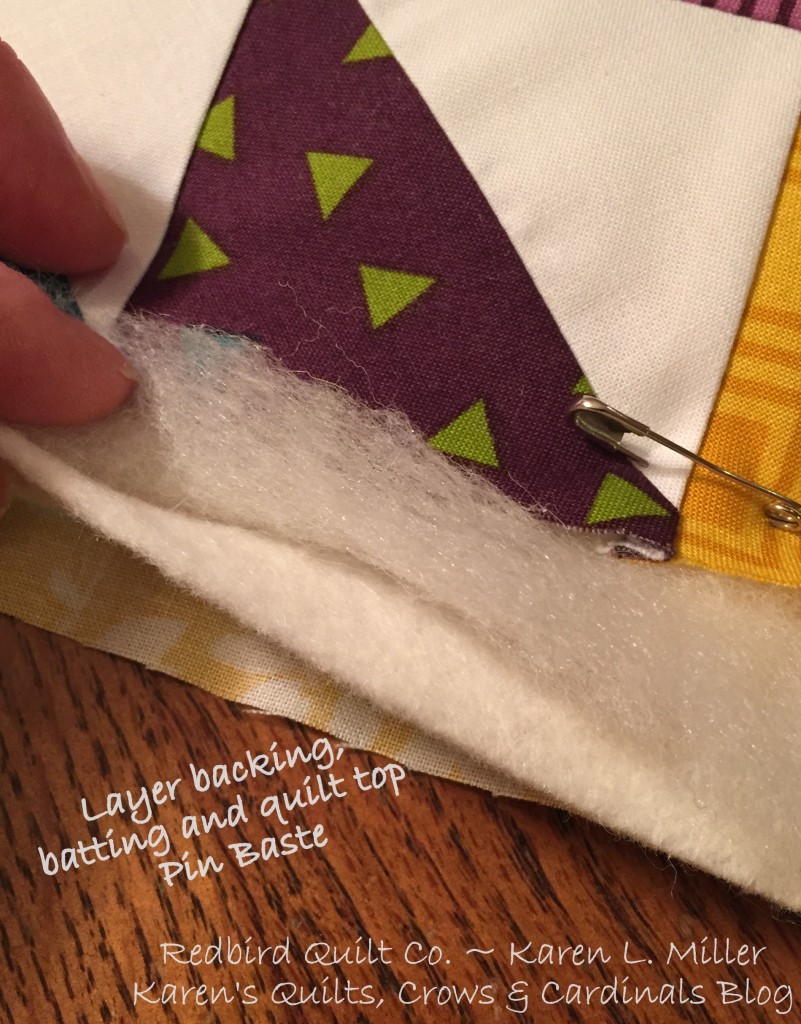
Cut and press a 30" square backing fabric. Cut the batting 30" square also.
I used two layers of batting for quilting (Learn more on my blog - click here).
Quilt As Desired !!!
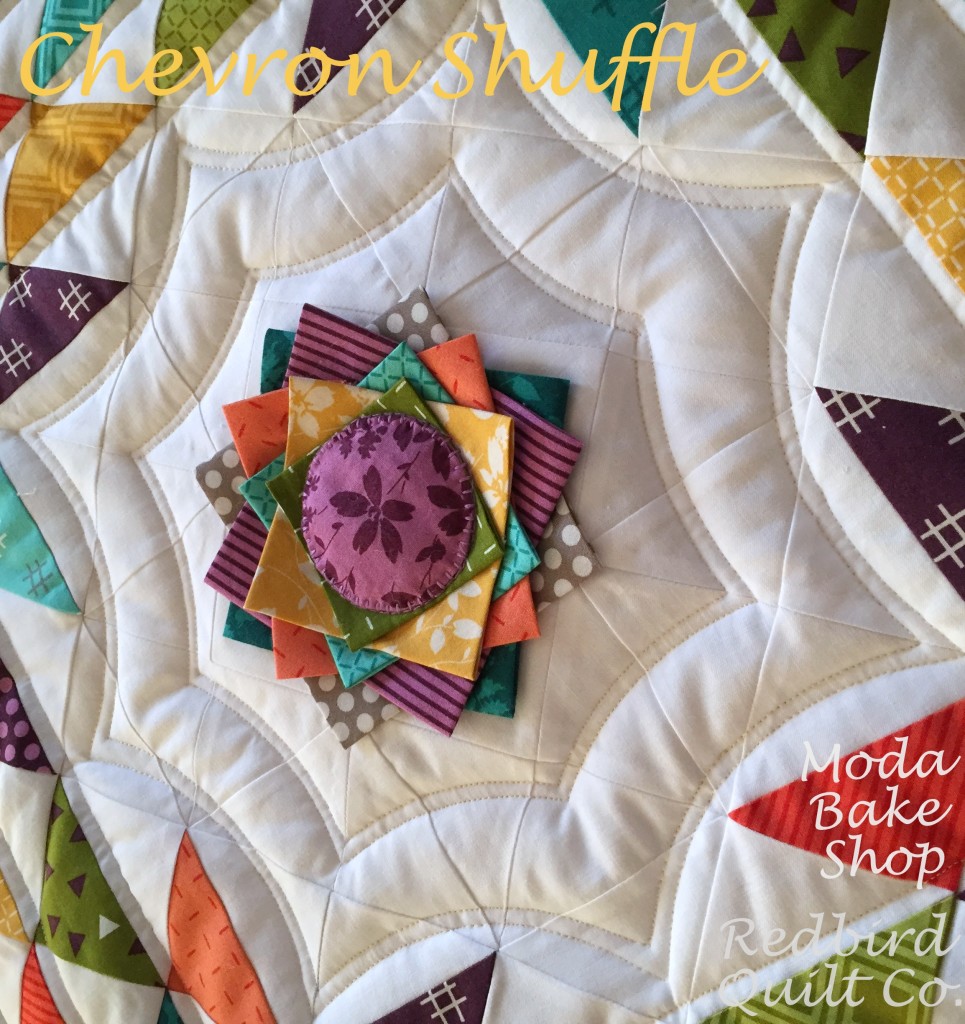
I planned for minimal quilting on this modern mini -- but that focus flower was asking to be highlighted with curves -- so curves it is!!
One fun thing about learning to Free Motion Quilt on a home machine is gaining the ability to finish your own quilts - another very rewarding aspect of quilting.
I used The Quilted Pineapple's QP Curve Templates to free motion quilt on my domestic/home machine. Sew fun!
You can't go wrong choosing Aurifil 40Wt Mako cotton for this minimal quilting design. The thread is just heavy enough for the stitches to stand on their own. Oh! it looks so beautiful! I used a pale yellow 40Wt, color #2105. I love the definition!
In the HST area, I used a walking foot for some 1/4" stitching (straight lines).
If your interested in more FMQ details be sure to stop by my blog and say hello.
Click here to link to Karen's Quilts, Crows and Cardinals blog .
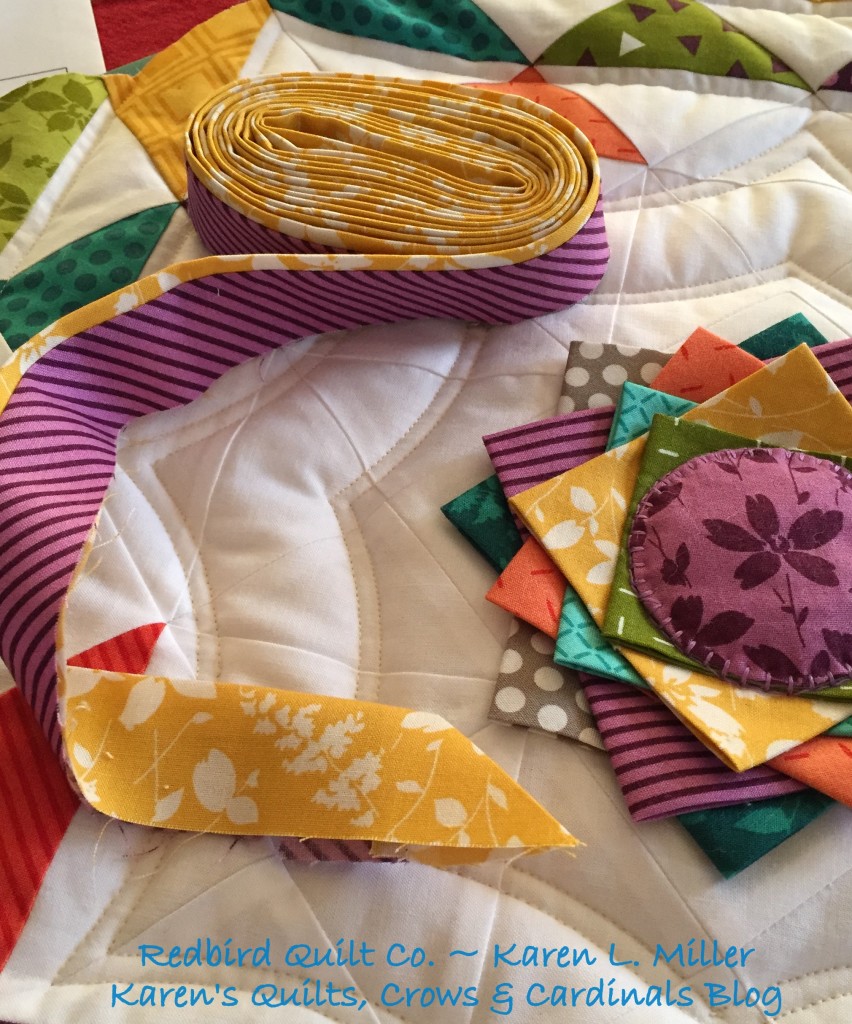
I decided to get crazy and add a flanged, mitered binding to the little quilt. A few dimension changes resulted in the flange being a little larger than normal.
It's so fun to add the accent color to a normal binding. You can review the Mitered and Flanged Machine Binding Tutorial here. I would love to get your feedback.
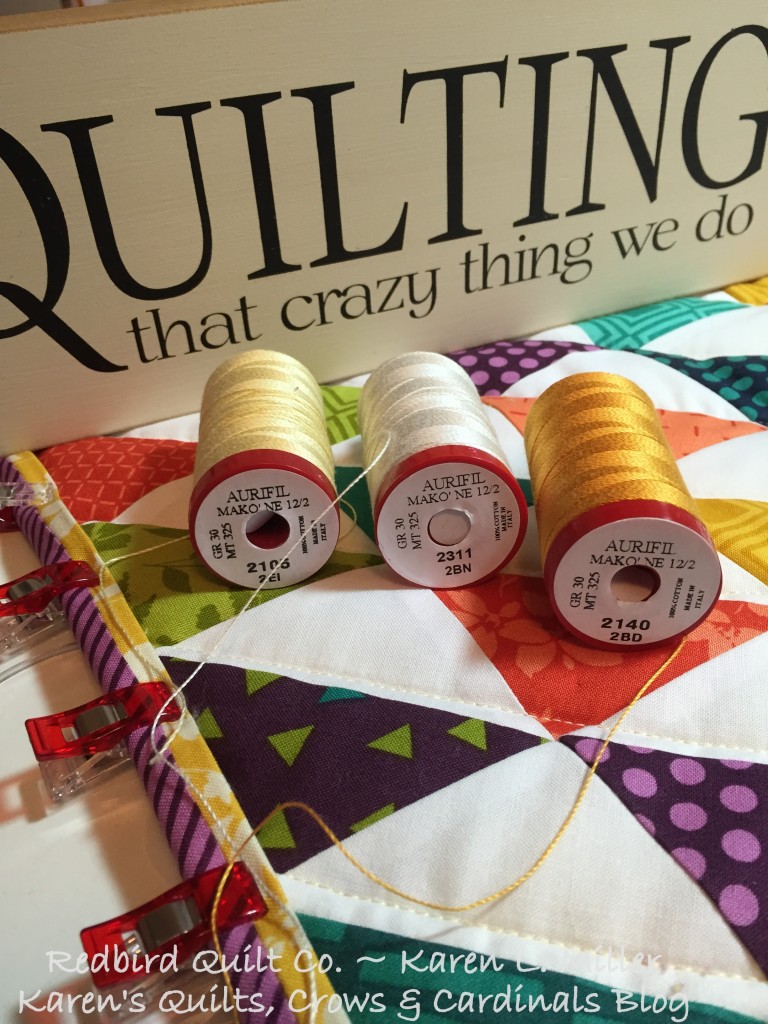
This binding gives you some creative leeway for color choices -- even when it comes to thread! Here I am making some tough choices on the machine finish top stitching thread color.
NOTE: Always unwind your thread from the spool to make an informed color decision. The spool color is sometimes deceiving -- a single thread will always be more accurate.
Because I used Aurifil #2105 (40 Wt) for the quilting, I decided to use the same color in a 12Wt for the machine top stitch. Isn't it yummy?
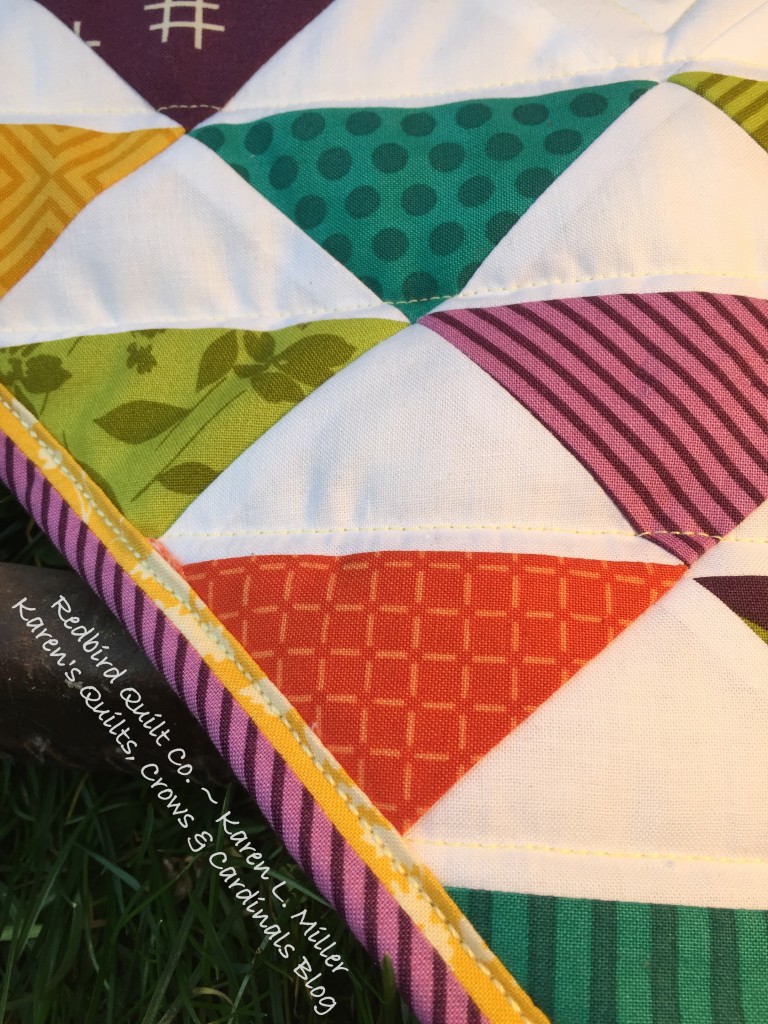
Mitered and Flanged binding detail....
Now this is fun -- The Basic Mixologie Violet stripe doesn't need to be cut on the bias to get this beautiful diagonal finish {Happy Dance}.
And how about that beautiful Aurifil 12Wt top stitch! Those fine details make all the difference ;)
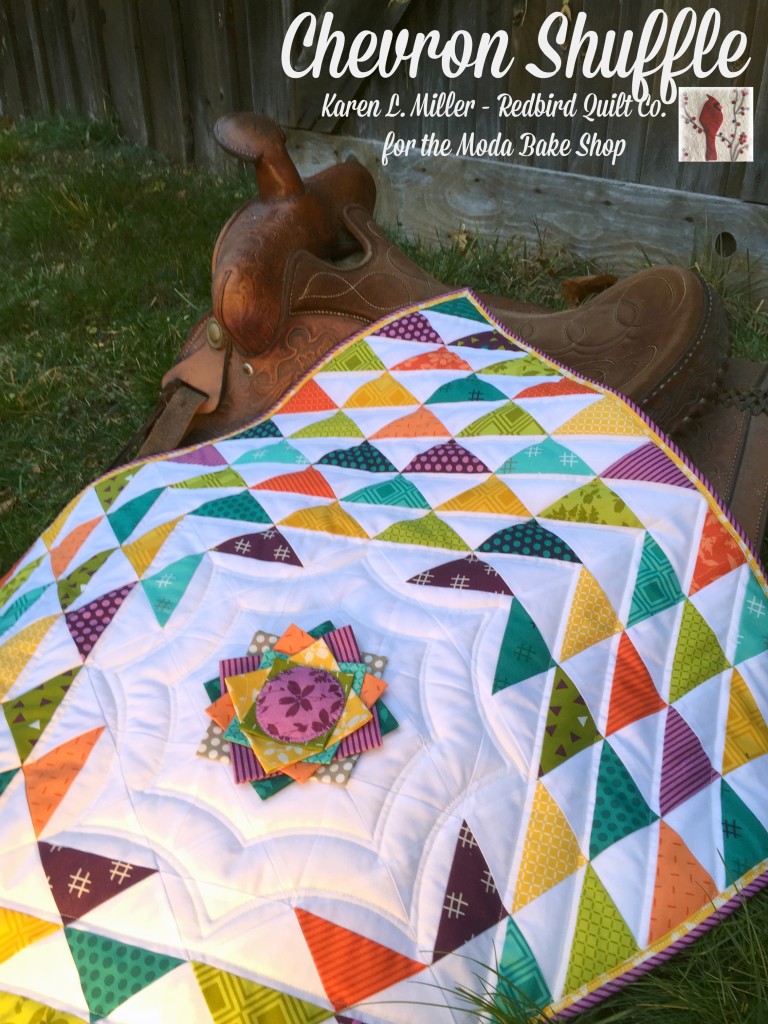
There you have it, one Chevron Shuffle Modern Mini Quilt -- finishing at appx 24" square.
I hope you've enjoyed creating the Chevron Shuffle modern mini quilt. It's a fun project and gives you a lot of opportunity to tune your piecing and artistic skills.
Be sure to jump over to my blog post for more details on the Free Motion Quilting. We're always having fun there! I'm also available on most social media platforms (icons below).
Have an awesome holiday and thanks so much for stopping by!
Karen L. Miller ~ Redbird Quilt Co.
{Karen's Quilts, Crows and Cardinals Blog}

